• HOME
  • FOOD
  • TRAVEL
  • ABOUT
  • Menu

COOKING WITH THE PAN

sharing food inspired by my background, travels, and places I've called home
  • HOME
  • FOOD
  • TRAVEL
  • ABOUT
IMG_4595.JPG

Cilantro Chive Pancakes with Yogurt Ranch Dip and Favorite Green Smoothies

October 11, 2020

October 11, 2020

My favorite time of the year is finally here. The arrival of fall can only mean three things – comfort food, cozy sweaters, and college football. I’m already beginning to enjoy comfort food and cozy sweaters, but I’ll need to wait a little longer before I can enjoy my third favorite thing, college football. Football season is a huge deal in the Midwest (especially Ohio). We all wait the entire year for football season to begin in the fall. Even though the weather is getting colder and colder each day, I still can’t help but to squeeze in more green smoothies. I’ve been making green smoothies almost daily throughout the summer. They are an absolute staple in my breakfast routine and helps me get in a few servings of fruits and veggies right away in the morning. I’ve been playing around with mixing and matching different ingredients into my green smoothies. Versions of my green smoothies included fruits and juices of peaches, mangoes, pineapples, apples, bananas blended along with spinach and kale. My favorite iteration of green smoothie is my version featuring tons of chopped kale, frozen banana, peach slices, and enough apple juice to get my desired consistency. All of these ingredients are tossed into a blender and whizzed together until everything is combined and smooth. Once the blender has done its job, I end up with the most beautiful bright green smoothie. The flavors of the peach paired with the apple juice definitely comes through. The banana adds the perfect texture and sweetness. The kale helps me feel better about getting my daily servings of veggies. Of course, just drinking a smoothie is not enough for breakfast. I also needed something else to go with my smoothie. If Kevin had his way, he would be enjoying a full American breakfast every morning. I, however, prefer some carb-y goodness to go along with my smoothie. My latest addiction has been a new twist on my usual go-to breakfast/brunch/snack – scallion pancakes. Scallion pancakes were a staple in my breakfast routine growing up. My family loved scallion pancakes so much, they would buy packs of frozen scallion pancakes from the local Asian grocery store to stock up in the freezer. When hunger strikes, they would grab one piece of frozen scallion pancake, pop the pancake into a large frying pan or toaster oven, and warm up the scallion pancake. In just a few minutes, the steaming hot scallion pancake is ready for eating. Mom’s all-purpose sauce (a combination of soy sauce, oyster sauce, and sugar) was almost always served on the side. Overtime, I’ve swapped in a variety of sauces to go with my scallion pancakes including a chimichurri soy dip, a cilantro scallion soy dip, and even a maple soy dip. This time though, I served up an easy yogurt ranch dressing to go along with my cilantro chive pancakes. My new favorite version of savory pancakes features tons of freshly chopped cilantro and thinly sliced chives weaved into flaky layers of pancakes. These pancakes came together very quickly and are most definitely addictive. I had to watch myself to make sure I did not eat too many of them.

Read More
Tags: savory
Comment
IMG_3901.JPG

Peanut Butter Chocolate Chip Banana Loaf

October 03, 2020

October 3, 2020

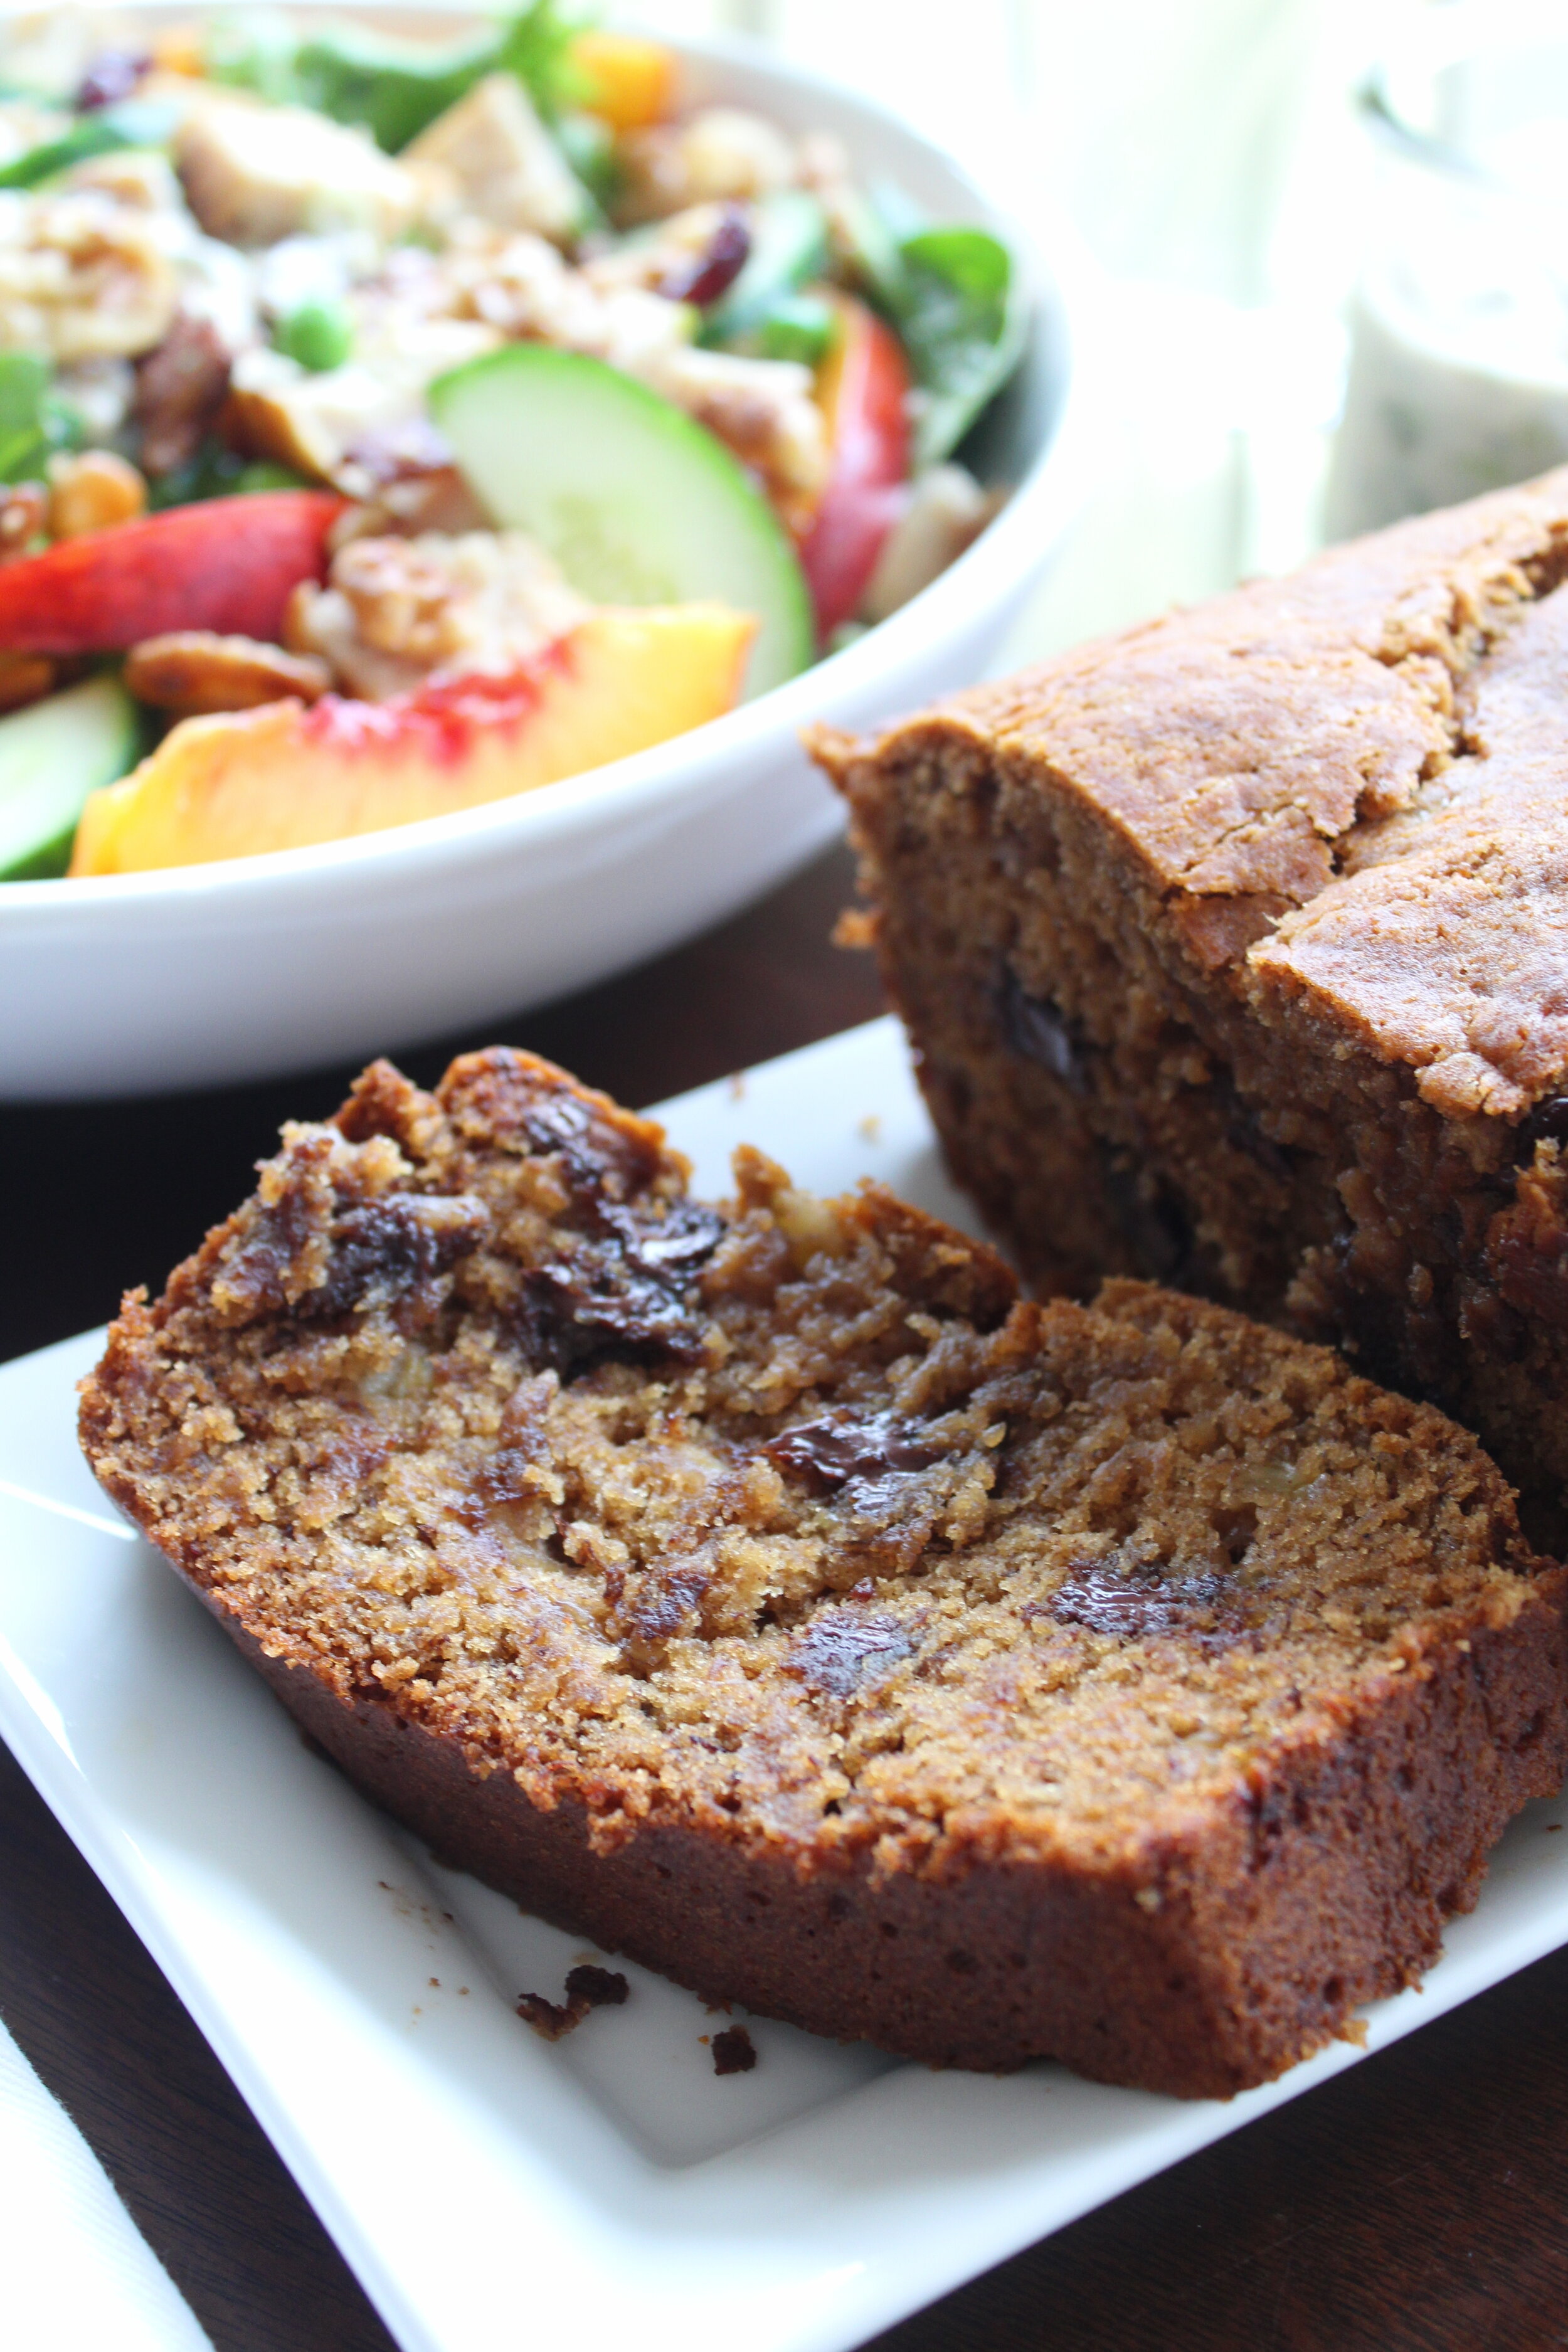
My peanut butter and chocolate chip banana loaf came about while I was playing around with creating a vegan version of banana bread. Around the same time, one of my friends had asked me to make a dessert for her husband’s birthday featuring peanut butter and chocolate chip and so I thought why not combine the two into a single dessert. With the end goal in mind, I got to work in the kitchen creating what will become my peanut butter and chocolate chip banana loaf. I started by analyzing all of the characteristics of some of the best banana bread I’ve ever had. The best banana bread always had chunks of bananas throughout the bread, was just slightly sweet, tender to the bite, and was always super moist. The banana loaf I set out to create in the kitchen had to have all of these qualities. I played around with different ratios of ingredients spread out over a few weeks until I got the ratios just right. It took a while to get the recipe just right because there was no way Kevin would eat banana bread, loaf, or whatever I called it consecutively for a few weeks. Once I found the right ratio of ingredients, I was ready to test out the banana loaf on friends. When it came to testing out the banana loaf, I couldn’t just rely on Kevin to give me the thumbs up. Kevin isn’t the hugest fan of banana bread and definitely frowns whenever he hears the word vegan mentioned in any recipe I create. The first couple of times I made my peanut butter and chocolate chip banana loaf, Kevin didn’t actually hate it – which is always a great sign. By the third time, Kevin actually thought the banana loaf was very good for those who enjoy banana bread. With Kevin’s semi-approval, I turned to our friends to test out the recipe. Each friend had its own idea of what the ideal banana bread consisted of. Some preferred banana bread loaded with nuts for some crunch. Others enjoyed just one texture throughout. None actually had a vegan version of banana bread until they tried my peanut butter and chocolate chip banana loaf. My peanut butter and chocolate chip banana loaf was the perfect, slightly sweet, chocolate dessert to serve at the end of a meal. Every bite was filled with a burst of chocolatey goodness. The banana loaf was just tender to the bite, had chunks of banana throughout, had just the right amount of sweetness, and was super moist. It met all of my criteria for the perfect banana bread. Better yet, all of the ingredients needed to make my peanut butter and chocolate chip banana loaf were already ingredients I had on hand in my pantry. When I served up the banana loaf to friends, they were amazed by how delightful the loaf turned out. One slice per person was just not enough. Some even went back for seconds and thirds.

Read More
Tags: sweet, vegan
Comment
IMG_3385.JPG

Building My Own Ramen Jars For Quick Meals

September 25, 2020

September 25, 2020

Fall weather has finally arrived. Mornings are filled with crisp, cool air. This time of the year is perfect for morning walks to help clear my head. Projects at work and coursework in school have been filling up most of my time throughout the weeks. During these especially busy times, I’ve been finding new ways to make quick, healthy, and portable meals. One lunch staple I’ve been experimenting with has been building my own ramen noodle cups. Instant noodle cups were a staple in my household growing up. It always came in handy whenever my grandparents or parents needed to feed hungry kids fast. My grandma would prepare instant noodles for my brothers and I as a quick snack or light meal the moment we got back home from school. I often think back fondly to those moments of enjoying a cup of sizzling hot noodles served directly in a cup. Long after I moved away from Brooklyn to attend college in Ann Arbor, I still turned to cup noodles for a meal in a hurry. Throughout my college years and even into my early professional working years, I would stock up on instant noodle cups for a quick meal. I didn’t only purchase cup noodles, I also stocked up on packaged noodles in a variety of flavors. I used to go through tons of instant noodle cups back when I lived in a dorm in Ann Arbor. When I started working full-time in Chicago, I would prepare an instant cup noodle on long days of teaching and grad school. The process was always the same for preparing cup noodles. I would boil some water either on a stovetop or in the microwave, peel back the top cover of the first instant noodle cup I could grab from the cupboard, pour in the boiling water, use my fork to hold the top cover closed, and wait anxiously for a few minutes until the noodles were just tender enough for eating. Sometimes, I would even add in fresh cilantro or frozen peas and carrots to convince myself I was eating healthier. As I got older, I started to transition to eating healthier versions of cup noodles by making my own versions served in a jar. I always tried to incorporate healthier ingredients into the cup noodles as an alternative to the packaged cup noodles. My favorite versions of instant noodles always had a dried powder mixed into the noodles. When I started crafting my own version, I experimented with blending together different dried ingredients from my pantry as the dried ingredients portion of my homemade cup noodles. The series of test trials led me to my favorite combination featuring dried minced garlic, dried minced onion, kosher salt, granulated sugar, and white pepper powder. I balanced the dried ingredients with a mixture of soy sauce, sesame oil, and oyster sauce as a way to pack even more flavor into the noodles. To build the noodle jars, I layer in the sauce, add a handful of crunchy vegetables, twirl in the slightly undercooked ramen noodles, and top the jars with fresh cilantro. Layering all of the ingredients in mason jars allowed Kevin and I to see exactly what was in the noodle jars. These noodle jars have been the perfect light lunch and dinner to refuel us throughout the busy weeks. Plus, I get the added benefit of not having to feel bad about what I’m eating because I know exactly what I put into these noodle jars.

Read More
Tags: savory
Comment
IMG_4193.JPG

Biscoff and Espresso Cream Icebox Cake

September 17, 2020

September 17, 2020

It has been a while since I have shared a recipe for an icebox cake. Earlier this month, I picked up a bag of Biscoff cookies (okay, maybe two bags) as I was on my usual grocery run. The cookies weren’t on my list of groceries to buy, but when I strolled through the cookies aisle to pick up some graham crackers, I caught a glimpse of the red and white package and couldn’t help myself. Staring at the bag of Biscoff cookies made me reflect back on some of my past travels. It was always a treat offered on domestic flights throughout the U.S. Whenever I flew to visit family or friends throughout the U.S., Biscoff cookies were always offered as a snack on the flights. As I stared at the bag of cookies, I came up with the marvelous idea of making an icebox cake using Biscoff cookies. The flavor profile for the cake immediately came to my mind. Biscoff cookies are usually served with coffee, so why not add espresso powder directly into the heavy cream and whip it into an espresso flavored cream. I usually make icebox cakes during the summer months because the summer heat makes me want to avoid using kitchen appliances as much as possible. Making an icebox cake is not only easy, but I also get a beautiful, delicious treat minus the vast amount of effort it would take to bake and frost a cake entirely from scratch. The moment I got home from my grocery run, I began building the icebox cake. I quickly whipped together a simple espresso whipped cream using heavy whipping cream, confectioners’ sugar, and instant espresso powder. Part of the reason for adding espresso powder into the whipped cream was so I could start using up the espresso powder I had stocked up on earlier this year to get my fix of Dalgona coffee. At the last minute, I decided to sprinkle in some cocoa powder. I wanted the cake to be somewhat reminiscent of tiramisù and thus adding in cocoa powder helped do the trick. I whipped up the espresso cream in a mason jar, a trick I developed along the way after making one too many messes while whipping cream in the kitchen. Once the cream started to thicken, I started to build my icebox cake, sprinkling in cocoa powder in between each layer. When I finished building the cake, the hardest part was to leave the cake alone for a few hours in the fridge before coming back to it hours later. Chilling the cake untouched in the refrigerator was the key to top notch icebox cakes. When enough time has passed (usually several hours), the cream will soften the layers of the cookie in the dessert, and I will end up with the perfect soft, creamy, and oh so fluffy icebox cake. The Biscoff and espresso icebox cake is perfect on its own, but even better served alongside — you guessed it — more coffee. Just one bite into a slice of the cake and I could taste the flavors of spiced cookies, espresso, and cocoa shining through. I have to watch myself to make sure I don’t eat too much of the icebox cake in one sitting. This icebox cake is so fantastic, I’ve made it three times this month alone. For my next attempt, I may even spread on some raspberry jam to really bring the ice box cake over the top and add a sweet fruity touch to the dessert.

Read More
Tags: sweet, easy
5 Comments
IMG_3872.JPG

Ultimate Summer Salad with Gorgonzola Yogurt Herb Dressing

September 07, 2020

September 7, 2020

It’s finally Labor Day weekend (and also a much needed long weekend). The start of September means the start of fall weather, flavors, and fashion very soon. Fall is my favorite season of the year. I love when the weather switches from scorching heat to cool crisp. The leaves on trees transform from deep greens to a spectrum of reds, oranges, yellows, and browns. Restaurants all around begin to shift from seasonal summer produce to sturdier vegetables and fruits. Warm spices, comfort foods, warming drinks are just some of the parts of Fall I absolutely love. The shift from summer to fall also means a shift from lighter summer meals to comforting fall dishes. Lightly tossed salads and pastas are replaced with heartier, comforting casseroles and baked goods. While Fall is just around the corner, I’m working even harder to stretch out the bountiful summer produce as long as possible before making way for squashes, apples, and pears. I’ve centered many of my meals throughout the days on the bounties of summer including tomatoes, corn, cucumber, stone fruits, and herbs. Ripe tomatoes and fresh basil have starred a major role in my tomato pesto tart. Sweet corn and cool cucumber have been featured many times in my summer garden salad. Juicy peaches (and sometimes nectarines) have made their way into my barbecue peach, arugula, and basil pizza. Herbs have been the perfect ingredients to liven up salad dressings. My latest kitchen craze has been tossing up a variety of salads and dressings for lunch and dinner. I’ve even tested out versions for brunch. One of my favorite versions of a hearty summer salad emerged from multiple experiments combining bits and pieces of fruits and vegetables at their peak of ripeness. My ultimate summer salad generously dressed with gorgonzola yogurt herb dressing was the result of those experiments. The salad features a bed of spring greens, arugula, and kale topped with assorted seasonal summer produce. Crunchy cucumber, sweet peaches, toasted walnuts, bright green peas, seasoned cubed chicken, and crispy crumbled bacon all work their way into the salad. A generous drizzle of my gorgonzola herb dressing livens up the salad and adds a creamy, tangy element to the rest of the salad. The flavors of my gorgonzola yogurt herb dressing are reminiscent of ranch dressing balanced with the distinct savory sharp flavor of crumbled gorgonzola cheese. Once my ultimate summer salad with gorgonzola yogurt herb dressing was complete, I was ready to soak in some sunshine as I enjoyed a good book outdoors. My perfect relaxing long weekend was finally complete.

Read More
Tags: salad, savory
Comment
IMG_3354.jpg

Baking up Refreshing Lime and Coconut Bars

August 30, 2020

I recently experimented with putting a spin on classic lemon bars and (after a few trial runs) ended up by baking the most marvelous lime and coconut bars. My lime and coconut bars are a variation of the classic lemon bars. Instead of the usual buttery short crust bottom, I swapped out the butter for refined coconut oil, and added in some unsweetened coconut flakes to really bring home the coconut flavor. For the filling, I swapped out the zest and juice of lemons for the zest and juice of limes. Together, the combination of lime and coconut was just the perfect pairing. Before I discovered my love for my lime and coconut bars, lemon bars were one of my favorite summer treats. I loved how portable, refreshing, and easy lemon bars were for a summer picnic. I would bake up batches of them, wrap them up in individual sheets of parchment paper, and tie the little wrapped squares into the perfect packaged squares. I would pack up a few bars at a time along with some turkey and cheddar sandwiches and roasted red pepper with hummus sandwiches, toss the sandwiches into a tote bag filled with frozen bottles of water, and head to the beach in Coney Island for a simple day at the beach. Coney Island holds a special place in my heart. My parents would take my brothers and I to Coney Island to ride the rollercoasters as kids and enjoy some carnival eats. Thinking about Coney Island brought back memories of childhood days spent running across the hot sand burning at the bottom of my feet. I remember chasing the ocean waves with excitement and watching the waves rise and fall. When I got tired of chasing waves, I would pull out a blanket, the sandwiches I packed, and my lovely lemon bars. The sandwiches always did their job in helping satisfy my hunger, but what I always looked forward to were the lemon bars. There was just something refreshingly delightful about lemon bars. The moment I bite into the lemon bars, I could taste the buttery crumble of the short crust on the bottom before reaching the best part – the tangy lemon curd filling on top. I love the contrast of the buttery, slightly salty short crust paired with the sweet and tangy lemon curd topping. The lemon bars definitely hit the spot as a cooling, refreshing treat to help offset the summer heat. With summer days winding down this year, I decided to put a spin on the lemon bars I typically make by creating a lime version. While testing out my lime bars, I thought about what would pair nicely with lime and coconut immediately came to my mind. Thus, my experiments with making the perfect lime and coconut bars began. I started by testing out different ratios of ingredients for my short crust dough. I wanted the bottom of the bars to be buttery, crumbly, and melt-in-your mouth. Once I got the ratios for the short crust down, I started experimenting with the lime curd topping. The lime curd topping was a bit tricky to get right. Pouring the filling directly into the cooked short crust resulted in eggy bars. After a few tries, I realized cooking the curd before pouring the curd on top of the cooked short crust was the best way to get the perfect lime and coconut bars. Once I made the pivot, my lime and coconut bars turned out perfect. The next step was to test out my lime and coconut bars with friends. I brought them along to a small gathering a couple weeks back, and the lime and coconut bars were a hit. They were the perfect summer sweet treat to end a simple summer lunch.

Read More
Tags: sweet
Comment
IMG_3633.JPG

Planning for Fall and Tomato Pesto Tart

August 23, 2020

August 23, 2020

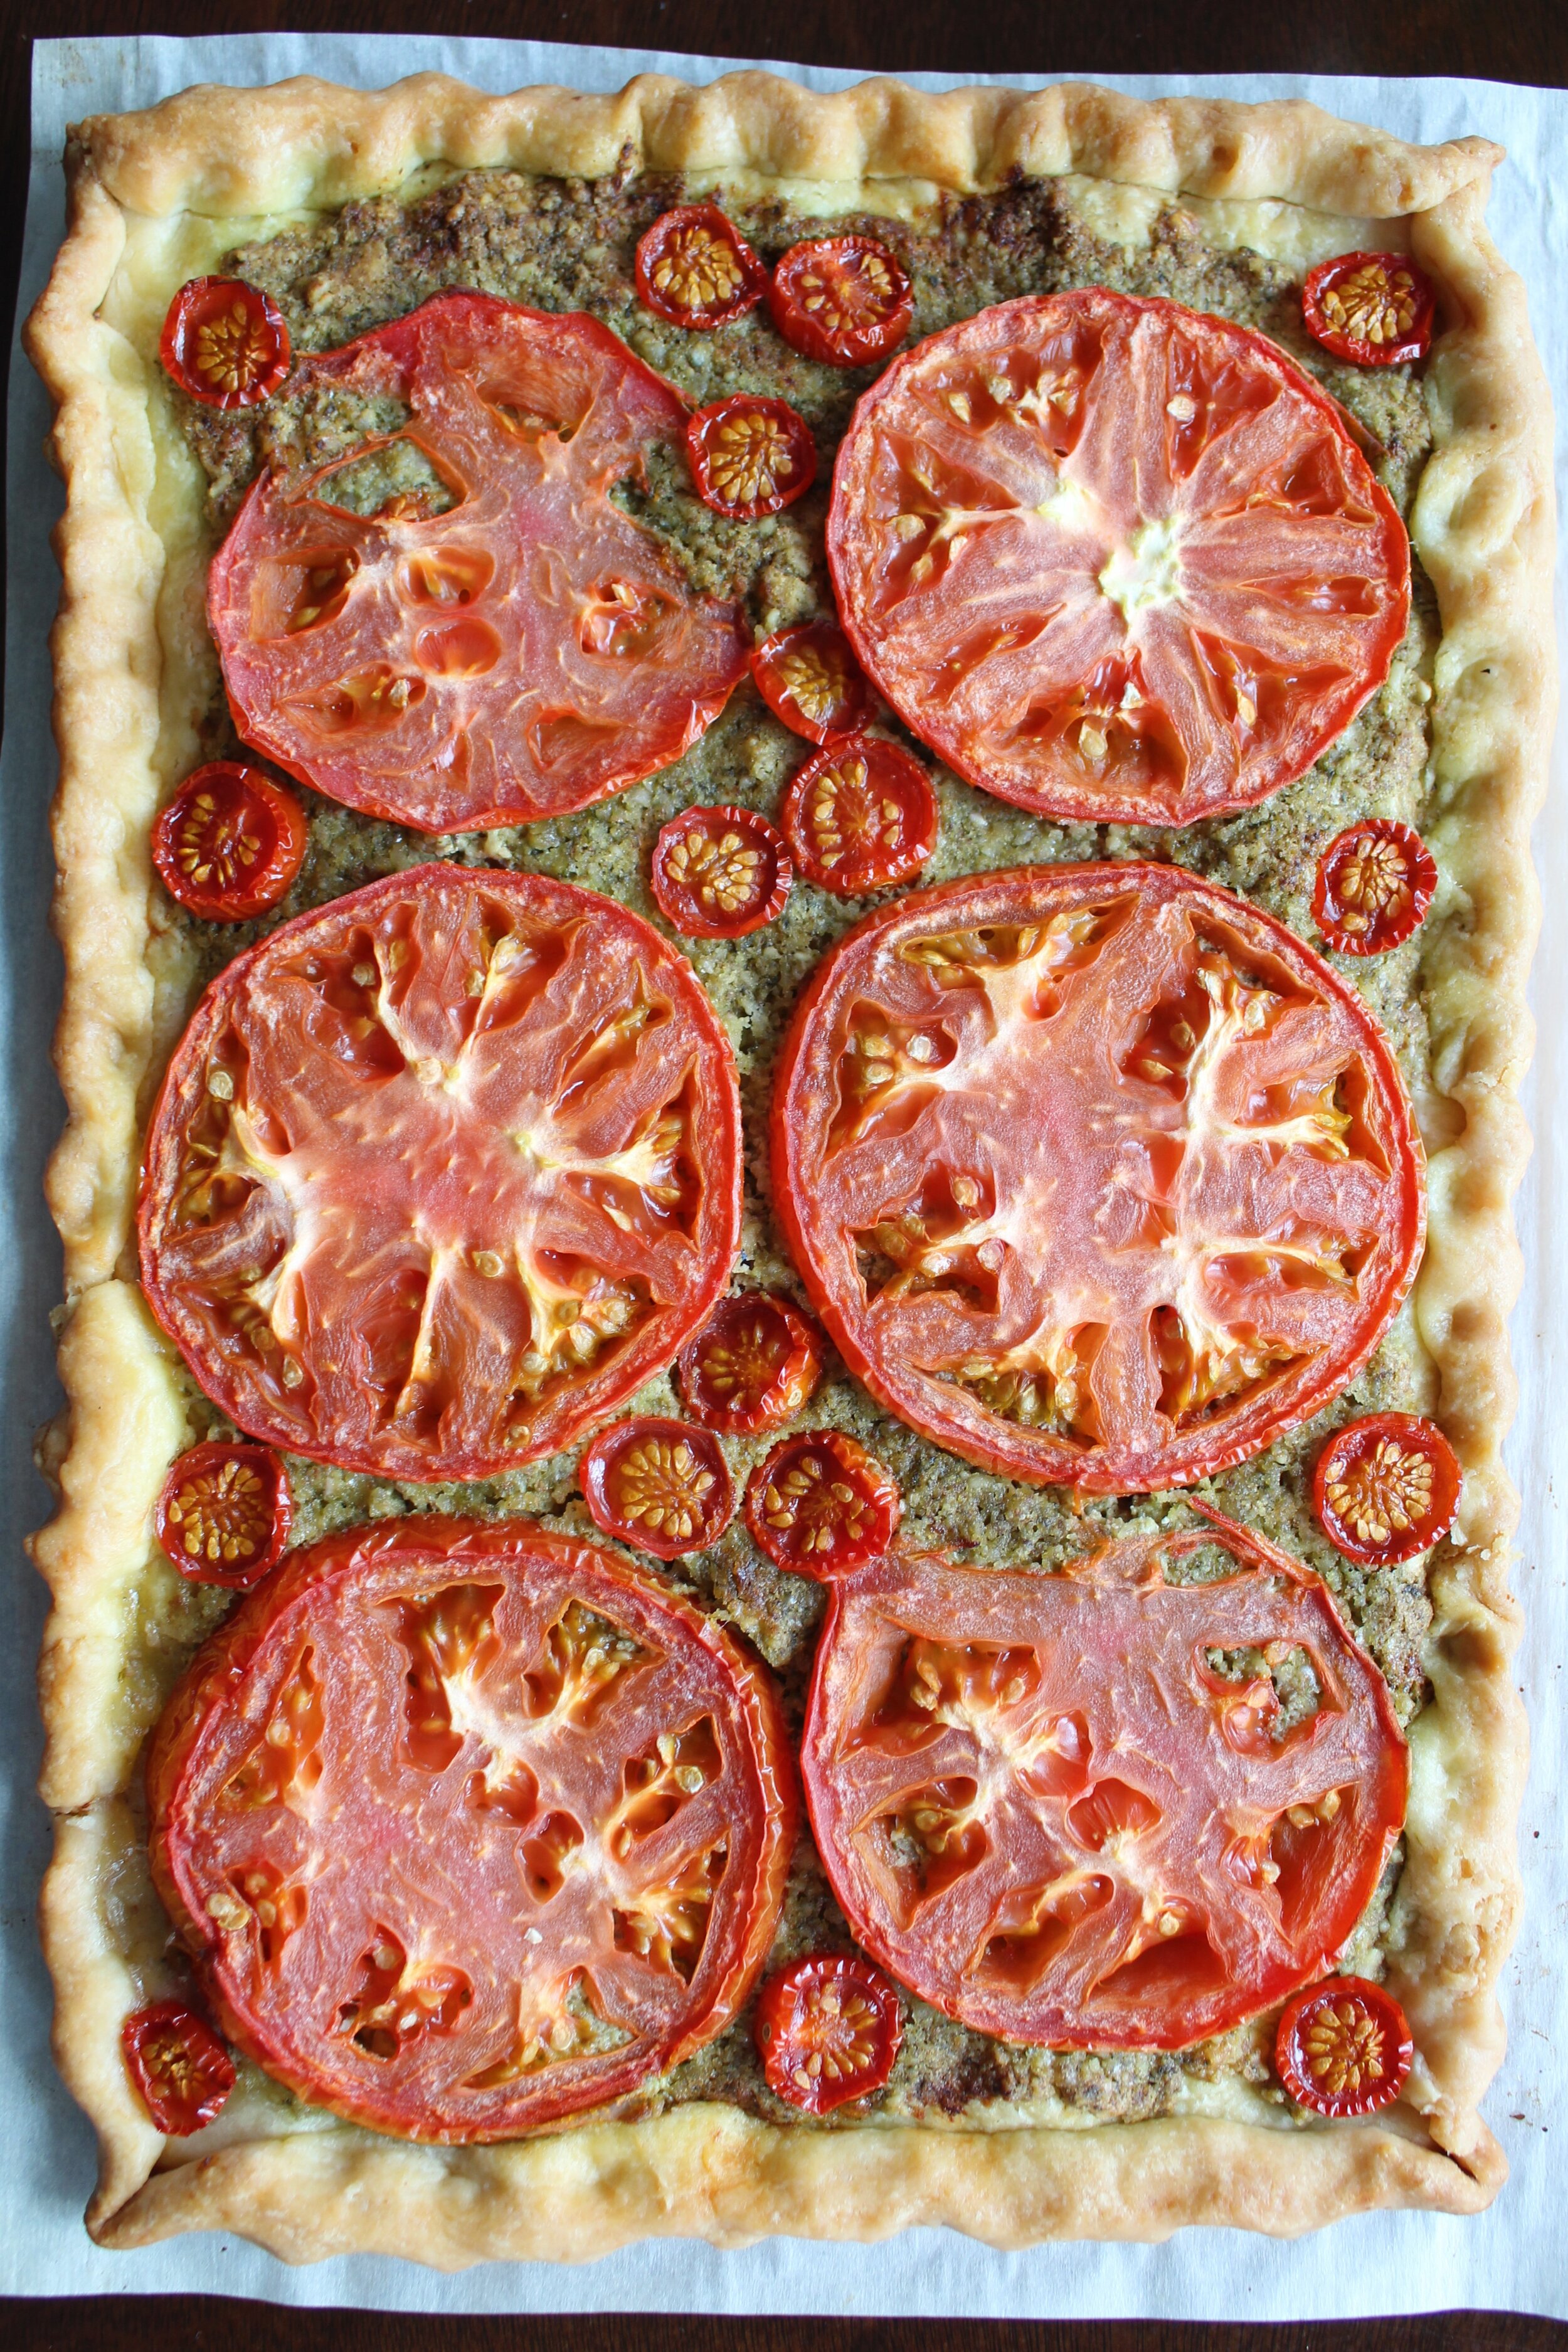
I can’t believe we are already entering the last few days of August. With summer winding down, and a new school year starting up again, I’ve decided to refresh my skills and return back to school. This time, I’m focusing on improving my digital photography skills through an online certificate program. Virtual class starts for me in just a few days. The end of summer means an eventual transition to fall produce, sweater weather, and spiced lattes. Before cooler weather hits, I’m trying to take advantage of the summer fruits and veggies still at their peak of freshness. Throughout the summer, I’ve been obsessed with working fresh herbs, stone fruits, and tomatoes into as many dishes as possible. When Kevin and I visited our friends a few weeks ago for a small birthday gathering, our friends gifted us with some fresh herbs and tomatoes straight from their garden. They had been growing the produce and herbs all summer long. Their heirloom tomatoes and fresh basil were finally ripe for picking. I stared at the ingredients and my mind conjured up images of tomato pesto tart, a variation of my favorite tomato tart. There really is nothing better than using produce at their peak of freshness and letting the bounty of the summer produce be the real stars in a dish. All of my tarts always start out with my trusty pie crust recipe. I’ve used my pie crust recipe in many galettes, hand pies, pastry pockets, and holiday pies. My pie crust recipe is beyond easy to whip up and turns out perfect every single time. For the pesto filling, instead of pine nuts (which I didn’t have on hand), I used the walnuts I had sitting in my pantry. The walnuts worked as the perfect substitute for pine nuts and still yielded a savory, flavorful pesto. The other ingredients (Parmigiano-Reggiano cheese, olive oil, garlic, salt, and pepper) were all items I had on hand. These items are always in stock in my pantry. I pull them out all the time for quick meals. All I had to do to whip up my pesto was to drop all of those ingredients directly into a food processor, pulse the ingredients for several seconds, and the pesto was done. Building the tomato pesto tart was the fun part. I rolled out the pie crust dough, topped the dough with pesto, and arranged the ripe heirloom tomatoes, cut into thick slices, on top of the pesto layer. Crimping the edges of the tart was the fun part. The inspiration for my rectangular shaped tomato pesto tart was the beautiful images of summer produce postage stamps. I popped the tomato tart on a baking sheet into the oven and thirty minutes later, the tomato pesto tart was ready for consumption. The tomato pesto tart turned out so delicious, I just had to make it again over the weekend. I swapped the tomatoes around for the second trial run and used a combination of beefsteak tomato and cherry tomatoes to give the tomato pesto tart varied tastes and textures. I made sure to keep the pie crust dough as rectangular as possible when rolling out the dough for the tart crust. My tomato pesto tart came together rather quickly. Once baked, the tart turned into the flakiest, sweet, and savory morning treat. To help balance out the savory tart, I prepared a simple summer fruit salad featuring my other favorite summer produce bounty – peach, nectarine, and mango – topped with some thinly sliced mint leaves. Kevin and I were both delighted by how tasty and visually stunning my tomato pesto tart turned out. I just had to capture the moment, and share my recipe.

Read More
Tags: savory
Comment
IMG_3097.jpg

Baking Up Loaves of Parmigiano-Reggiano Herb Bread

August 18, 2020

August 18, 2020

My latest experiment in the kitchen has been working to perfect my Parmigiano-Reggiano herb bread. I first made this bread a few weeks ago when I was trying to experiment with a new quickish bread recipe to bring along to a small birthday gathering. Our friends had smoked some meats to share, so it was only natural for me to make some cheesy carbs to serve alongside the smoked meats. I had been playing around with making a version of crusty bread in my kitchen oven for the last few weeks. When I ended up making a fairly good loaf of plain crusty bread, I started to work on incorporating other elements to really help the bread stand out. My experiments led me to add a couple ounces of Parmigiano-Reggiano cheese (one of my absolute favorite cheeses other than cheddar and Asiago), and some dried herbs (equal parts Italian seasoning and dried oregano). Yes, I’m aware Italian seasoning already has oregano, but I wanted my bread to have more dried oregano in relation to the other dried herbs. It did take me a few tries before I got the bread just right, but once I reached the perfect ratio of ingredients, the end result was the most savory, crusty, fluffy, and truly spectacular bread. In my hopes to ensure the spectacular bread wasn’t just luck, I decided to bake up a couple more loaves of my Parmigiano-Reggiano herb bread for others to try. The second time around, I brought my Parmigiano-Reggiano herb bread to our friend’s small birthday gathering. My Parmigiano-Reggiano herb bread turned out to be a huge hit with our friends. One of our friends described the bread as being similar to the bread he once had at an elegant local restaurant in Montgomery, Ohio. I was very pleased with how the bread turned out and decided to try making it one more time before sharing the recipe with the world. For me, the hallmark of a great bread lies in all of the elements making up the bread. The bread has to have a crusty exterior, a fluffy interior (with tons of air pockets), and a deep savory flavor. My Parmigiano-Reggiano bread had all of those elements and more. The magical part about the bread was how a few simple pantry ingredients combined with some TLC and patience turned a piece of dough into the most remarkable bread. While the bread did take almost three hours to make from start to finish (including the time it took for the dough to rise properly), the actual active work time was closer to about 30 minutes. Giving the bread sufficient time to rise in between forming the dough, and separating the dough into loaves really made a difference in the end result of the bread. The more time the bread had to rise, the better the result. I did check on the bread about once every 20 minutes just to make sure the active dry yeast was doing its job in helping bubbles form in the bread. Once the loaves of bread looked sufficiently bubbly, I popped the loaves of bread into the oven and trusted the oven to do its part in transforming the bubbly dough into the most marvelous cheesy bread. The bread turned out absolutely amazing the third time around. With the success of the bread multiple times around, I was ready to share my findings with everyone.

Read More
Tags: savory
Comment
IMG_2738.JPG

Favorite Summer Garden Salad, Crispy Chicken Sliders, and Honey Lemon Tea for A Midsummer Picnic

August 11, 2020

August 11, 2020

August in Ohio is when summer is at its peak of heat. These days, the only times I actually step foot out the door are to run errands or run to the local supermarket for a quick grocery run. Even those trips, I try to minimize the amount and length of times I have to leave our home as much as possible. On the days when I do make a trip out to the grocery store, I head straight for the seasonal produce aisle. Seasonal produce is my favorite part about grocery trips during the summer. The produce towards the front of the supermarket are almost always on sale, in season, and at its peak of freshness. Stone fruits and tropical fruits tend to make their way to my grocery cart more often than not. In almost every grocery trip I’ve made during the summer, I’ve stocked up on tons of peaches, nectarines, mangos, watermelon, and citrus. I use stone fruits in the summer like I use apples during the fall. They star a major role in many of the dishes I cook and add an element of sweetness to any salad or grain bowl I toss together. Peaches and nectarines have starred a major role in one too many summer pizzas. This weekend, Kevin and I took a midday break to enjoy a picnic for two. Whenever I plan a picnic, I try to plan the menu around portable foods. The easier it is to eat the foods, the better. For our midsummer picnic, I prepped my favorite summer garden salad featuring tomatoes at their peak of ripeness, cooling cucumber cut into small pieces, sharp red onion diced finely, sweet corn kernels removed off their cobs, tons of freshly chopped parsley, a squeeze of lemon juice, and a light sprinkling of kosher salt. The summer garden salad was so good, I brought it along to a couple small birthday gatherings throughout the summer. Picnics for us aren’t complete unless we have some sort of handheld sandwich. Kevin’s latest obsession (or maybe addiction) has been the spicy crispy chicken sandwich from Popeyes. He would go out of his way to drive to Popeyes just so he can get his fix of the spicy crispy chicken sandwich. To appease Kevin’s cravings, I created my own version of the spicy chicken sandwich to serve for our picnic. The crispy chicken was prepared the same way I prepare my crispy chicken strips. My version of the crispy chicken sandwich features crispy chicken, lightly toasted brioche sliders with sriracha mayo and fresh arugula (because you know, veggies). The only item left to pack was a refreshing drink. In my family, tea is usually the drink of choice – whether served hot, cold, or featured in bubble tea. I decided to make a refreshing version of cold tea featuring lemon slices, fresh mint, and a drizzle of honey. With the minty lemon iced tea done, we were all set to enjoy our summer picnic for two. There truly isn’t any activity more perfect in the summer than a picnic. The picnic was a much-needed break for both of us after the busy last couple of weeks we had filled with work, home projects, and fall planning.

Read More
Tags: savory
Comment
IMG_9063.jpg

Revisiting My Favorite Bacon and Egg Fried Rice

August 03, 2020

August 3, 2020

Today, I’m revisiting another one of my favorite pantry meals, bacon and egg fried rice. I first tossed together this version of fried rice when I tried to use up some leftover ingredients in my refrigerator. I saw some bacon and eggs and thought to myself why not combine these items together into fried rice. Thus, my bacon and egg fried rice was born. Fried rice holds a special place in my heart. It was a dish my family made almost weekly when I was growing up. We ate fried rice for parties in school. Fried rice brought our family together for celebrations. My family even used fried rice as a way to clear out all of the remaining bits and pieces of meats and veggies lying around in our fridge at the end of each week. Pretty much anything you can think of has played a role in one or another version of fried rice. Eating a bowl of fried rice tossed together by my mom, dad, grandma or grandpa always brought a huge smile to my face. I remember eating around the bits of chopped char siu in my bowl of fried rice and saving those small bits for the very end. The crispy char siu bits infused layers of flavor into the fried rice. Long after I moved to the Midwest, I’ve continued to turn to fried rice as a way to help use up leftover meats and veggies sitting in my fridge. Outside of char siu, my family also loved to toss in lap cheong, the smoked meat of choice for homemade fried rice in our household. Lap cheong releases the most intense sweet, savory, and smoky flavors when heated. I would describe lap cheong as a cross between the western equivalent of bacon and sausage. Even thinking back, I can still taste the aromatic smoky flavors of lap cheong in the homemade versions of fried rice I ate growing up. After moving to Ohio, it became a lot more difficult to access some of the Chinese ingredients my family would use to make many of their dishes. Lap cheong was one of those items. I often had to find other ways to infuse smoky flavor into my fried rice. One way I accomplished this was by cooking up some bacon and infusing the rendered fat from the bacon into cooked, cold jasmine rice. Bacon was such an easy swap. It brought layers of flavor into the rice. One scoop of bacon and egg fried rice was all the confirmation I needed to add this fried rice into my monthly meal rotations.

Read More
Tags: savory
Comment
Prev / Next
FBPP2.jpg

Hello! My name is Jia Pan and I love to experiment with food. My site is a collection of recipes and stories chronicling my adventures in the kitchen and around the world.
Read More


Featured Recipes

Featured
Tea Party for Three + Heart-Shaped Jam Cookies
Jun 29, 2025
Tea Party for Three + Heart-Shaped Jam Cookies
Jun 29, 2025
Jun 29, 2025
Winter Adventures and Maple Blueberry Muffins
Mar 9, 2025
Winter Adventures and Maple Blueberry Muffins
Mar 9, 2025
Mar 9, 2025
Summer and Fall Adventures and Cinnamon Roll Scones
Oct 27, 2024
Summer and Fall Adventures and Cinnamon Roll Scones
Oct 27, 2024
Oct 27, 2024
Spring Celebrations and Wild Blueberry Whoopie Pies
Jun 23, 2024
Spring Celebrations and Wild Blueberry Whoopie Pies
Jun 23, 2024
Jun 23, 2024
Winter Travels and Smoky Cheddar Heart Crackers
Mar 10, 2024
Winter Travels and Smoky Cheddar Heart Crackers
Mar 10, 2024
Mar 10, 2024
Barbecue Chicken Bo Lo Bao and Adventures with Z
Dec 17, 2023
Barbecue Chicken Bo Lo Bao and Adventures with Z
Dec 17, 2023
Dec 17, 2023
Egg Tarts with A Twist and Summer Adventures with Z
Sep 4, 2023
Egg Tarts with A Twist and Summer Adventures with Z
Sep 4, 2023
Sep 4, 2023
Dragon Fruit Strawberry Cupcakes and Z’s First Birthday
May 29, 2023
Dragon Fruit Strawberry Cupcakes and Z’s First Birthday
May 29, 2023
May 29, 2023
A Strawberry Twist on Iconic Black and White Cookies
Mar 31, 2023
A Strawberry Twist on Iconic Black and White Cookies
Mar 31, 2023
Mar 31, 2023
Lunar New Year + Our Family's Ginger Scallion Steamed Fish
Feb 25, 2023
Lunar New Year + Our Family's Ginger Scallion Steamed Fish
Feb 25, 2023
Feb 25, 2023