• HOME
  • FOOD
  • TRAVEL
  • ABOUT
  • Menu

COOKING WITH THE PAN

sharing food inspired by my background, travels, and places I've called home
  • HOME
  • FOOD
  • TRAVEL
  • ABOUT
IMG_1557.JPG

Cilantro Citrus Coconut Soup with Mussels

June 30, 2019

I don’t cook seafood too often (because Kevin strongly dislikes seafood), but yesterday, I had the whole day to myself and ended up making a version of a Thai inspired coconut soup with some mussels. The inspiration for this dish came from a meal I had a restaurant in the Over-the Rhine neighborhood of Cincinnati. Last year, some of my friends from Ohio threw a small bachelorette party for me in Cincinnati and brought me to a dainty wine bar and restaurant in OTR. We started the afternoon off with making candles at The Candle Lab before heading to Zula for dinner. When we got to the restaurant, we were seated almost immediately. We glanced at the menu and our eyes were immediately drawn to the mussel bar. The four of us ordered four pots of steaming mussels from the restaurant’s mussel bar and each took turns tasting the many soup bases. I ordered French classic filled with a creamy wine base. My friends ordered the Vietnamese Pho style, New Orleans style, and Thai style. Each soup base had its own distinctive flavors and aromas from the country it drew its inspiration from. The flavors of all four soup bases were so satisfyingly good. While I loved all of the different soup bases, the Thai version featuring Thai basil, coconut milk, fish sauce, lemon grass, and ginger was my favorite. At the time, I made a mental note to recreate this dish at home somewhere down the road. Well, more than a year later, I finally decided to recreate this dish. I put my own spin to the dish by making a cilantro citrus coconut soup base, and tossing some separately steamed mussels into the pot to finish simmering with the soup. The soup with the mussels turned out so good, I just had to share the recipe. My Thai inspired version of the soup base featured coconut milk, ginger, lime, lemon, cilantro, fish sauce, and soy sauce. All of the ingredients were added to the pot to simmer away. While the soup was simmering in one pot, I separately steamed some frozen mussels in its vacuum sealed package in a separate pot following the instructions on the package. Once the mussels began to open up, I removed the mussels from the package, tossed them in the coconut soup, and allowed the mussels to simmer in the soup for another minute before serving up the mussels and soup for lunch. My cilantro citrus coconut soup with mussels transported me back to the moment I shared with my friends over a year ago.

Read More
Tags: soup
Comment
IMG_1062.JPG

Mushroom Beef Stew

June 27, 2019

It’s not winter, but I had an intense craving for some warm, comforting stew this week. I looked in my refrigerator, saw some carrots, mushrooms, and beef sitting on the shelves, and thought to myself why not make a beef stew. I love making beef stews on cold winter days. While hot summer days aren’t ideal for leaving my Dutch oven pot cooking for long periods of time on the stove, my cravings trumped the inconvenience. Beef stew is actually one of the first recipes I ever made when I first started cooking. My first version of beef stew was just a bunch of vegetables and some precut beef dumped into a pot and cooked over low heat. While my first attempt was acceptable, I definitely refined the flavors and technique over time. Browning the beef ahead of time definitely makes for a beef stew with more depth of flavor. I love making stews because it is one of those dishes where you really can’t get it wrong. You brown your favorite protein, choose your favorite vegetables, and dump it all in a pot to cook until all of the flavors come together. The best part is it is both approachable and a one pot meal. Next week is the fourth of July. I’ve been doing some light summer cleaning to keep my home neat for when my parents visit next week. In between work and projects, I’ve been able to squeeze in some time to tidy up my home. I’m excited for my family to visit during the fourth of July week because of the festivities in Ohio. Columbus has its annual red, white, and boom celebration which always draws in a large crowd from around the world. Last year, I attended the event with a friend and thought it was a really neat celebration in central Ohio. This year, I wanted to take my parents to the event so they can see some of the great aspects of Ohio. I even completed some of my photography assignments ahead of time just so I can spend quality time with my family without having to worry about looming deadlines. Mostly, I will have some time to cook with my mom and dad in the kitchen. My parents cooked a lot throughout my childhood. One of the dishes I’ve been hoping to learn from my parents is the Pan family braised beef. Stay tuned on whether or not we will have the opportunity to make it during their visit. In preparation for their visit next week, I’ve been refining my mushroom beef stew recipe.

Read More
Tags: savory
Comment
IMG_0883.jpg

Chicken and Egg Rice Bowls

June 25, 2019

Today, I’m excited to share my chicken and egg rice bowl recipe, a very loose adaptation of the oyakodon. I love a chicken and egg rice bowl at any time of day. I could eat it for breakfast, lunch, or dinner and for multiple times throughout the week. My chicken and egg rice bowl is one of Kevin’s favorite comfort breakfast foods. He too can eat it at any time of the day for multiple meals throughout the week. I consider my chicken and egg rice bowl to be a pantry, go-to comfort dish. If I have one of those days where I want something quick, and comforting with flavors from my childhood, I prepare a chicken and egg rice bowl using mostly ingredients I have stocked in my refrigerator and pantry. It’s one of those extremely easy and tasty dishes which comes together quickly and fills you up. With just a few ingredients prepped ahead of time, you can easy whip up a warming bowl of chicken and egg over rice. The month of June seemed to have zipped by fairly quickly. I’ve been immersed in work, classes, projects, photography, and cooking all month long. My photography classes have kept me busy during my free time. Most of my photography assignments prevented me from just vegging out on my couch. The assignments actually encouraged me to step outside more often to capture some of the beautiful aspects of nature. Learning about the fundamentals of photography have also helped me improve on my food photography. My favorite time to take photos is usually in the morning when there is still a good amount of soft light outside. Alternatively, I also head outside in the evening right before sun begins to set. Over the weekend, I spent a good amount of time in the morning snapping photos. After an hour or so, I worked up an appetite for breakfast. I prepared two chicken and egg rice bowls for both Kevin and I. I start by preparing the rice in a small pot over the stove. As the rice is cooking, I begin thinly slicing a small onion, scallions, and chicken breasts. Once I’ve prepared those ingredients, I move on to making the base for the sauce. The sauce I use is a combination of Shaoxing wine, soy sauce, granulated sugar, white pepper, and black pepper. At this point, I add half of the sauce to the thinly sliced chicken breasts to marinate the chicken pieces in the sauce. I heat up a skillet on medium heat, add the thinly sliced onion and scallions and let the ingredients cook until softened. I then add in the chicken pieces with the marinade and let the chicken pieces cook through before adding the remaining sauce and cracking two eggs directly into the skillet. I swirl the eggs into the mixture slightly and allow the chicken and egg omelet to cook until set.

Read More
Tags: savory
Comment
IMG_0976.JPG

Lemon Strawberry Cupcakes

June 23, 2019

We are in the midst of summer and all I crave constantly are refreshing fruits, salads, vinaigrette-based pastas, barbecued meats, and ice pops. Yesterday, Court invited Kevin and I to her home for a cook out and asked if I could bring my famous (amongst our friends) cupcakes. I had initially planned on bringing my tomato basil pasta salad because I had yet another pasta salad craving this weekend, but Court insisted I bring some cupcakes. Whenever there is an event going on, our friends always ask me to bring my cupcakes. This time around, I wanted to make some refreshing cupcakes, so I decided to make lemon strawberry cupcakes, a spin on my strawberry cupcakes. I decided to combine my love for lemons and strawberries into lemon strawberry cupcakes since I tend to make strawberry lemonade a lot during the summer. The sweetness from the sun ripened strawberries combined with the tartness from the fresh lemons are just the perfect pairing for a refreshing summer dessert. Summer time is also a wonderful time for pool days and after dinner evening strolls. The only downside to summer is the unavoidable battle with mosquitos. For some reason, I can’t seem to go for a walk outside and not get at least one mosquito bite. I find myself having to cover my arms and legs in bug spray constantly. Luckily, I love cooking and baking and both activities do not require me to go outside too often. I started working on my lemon strawberry cupcakes early Saturday morning. I left a pound of butter out on my kitchen counter to come to room temperature. I had to double my usual cupcake recipe to make enough for everyone at the cook out. The base for my cupcake recipe is the same as my strawberry cupcake recipe. I folded in the zest from a lemon to add a refreshing lemon flavor to the cupcakes. Once the cupcakes were prepared, I let them cool before frosting them with lemon strawberry buttercream frosting. My lemon strawberry frosting starts off with room temperature butter. I then slowly fold in confectioners’ sugar, lemon juice, pureed strawberries (strained to remove the seeds), and some vanilla extract. All of the ingredients continue to get gently stirred until the frosting turns into a fluffy buttercream consistency. My favorite part of making cupcakes is decorating each cupcake individually. I had some candy Sixlets and topped half of the cupcakes with the candy-coated chocolate pieces. By the time I finished decorating my lemon strawberry cupcakes, the temperature in our home was on the warmer side from all of the baking. I placed the cupcakes into the cupcake carrier I got as a gift from Ada and popped the entire carrier into the refrigerator to set and stay cool.

Read More
Tags: sweet
Comment
IMG_0528.jpg

Seasoned Two Cheese Macaroni and Cheese

June 19, 2019

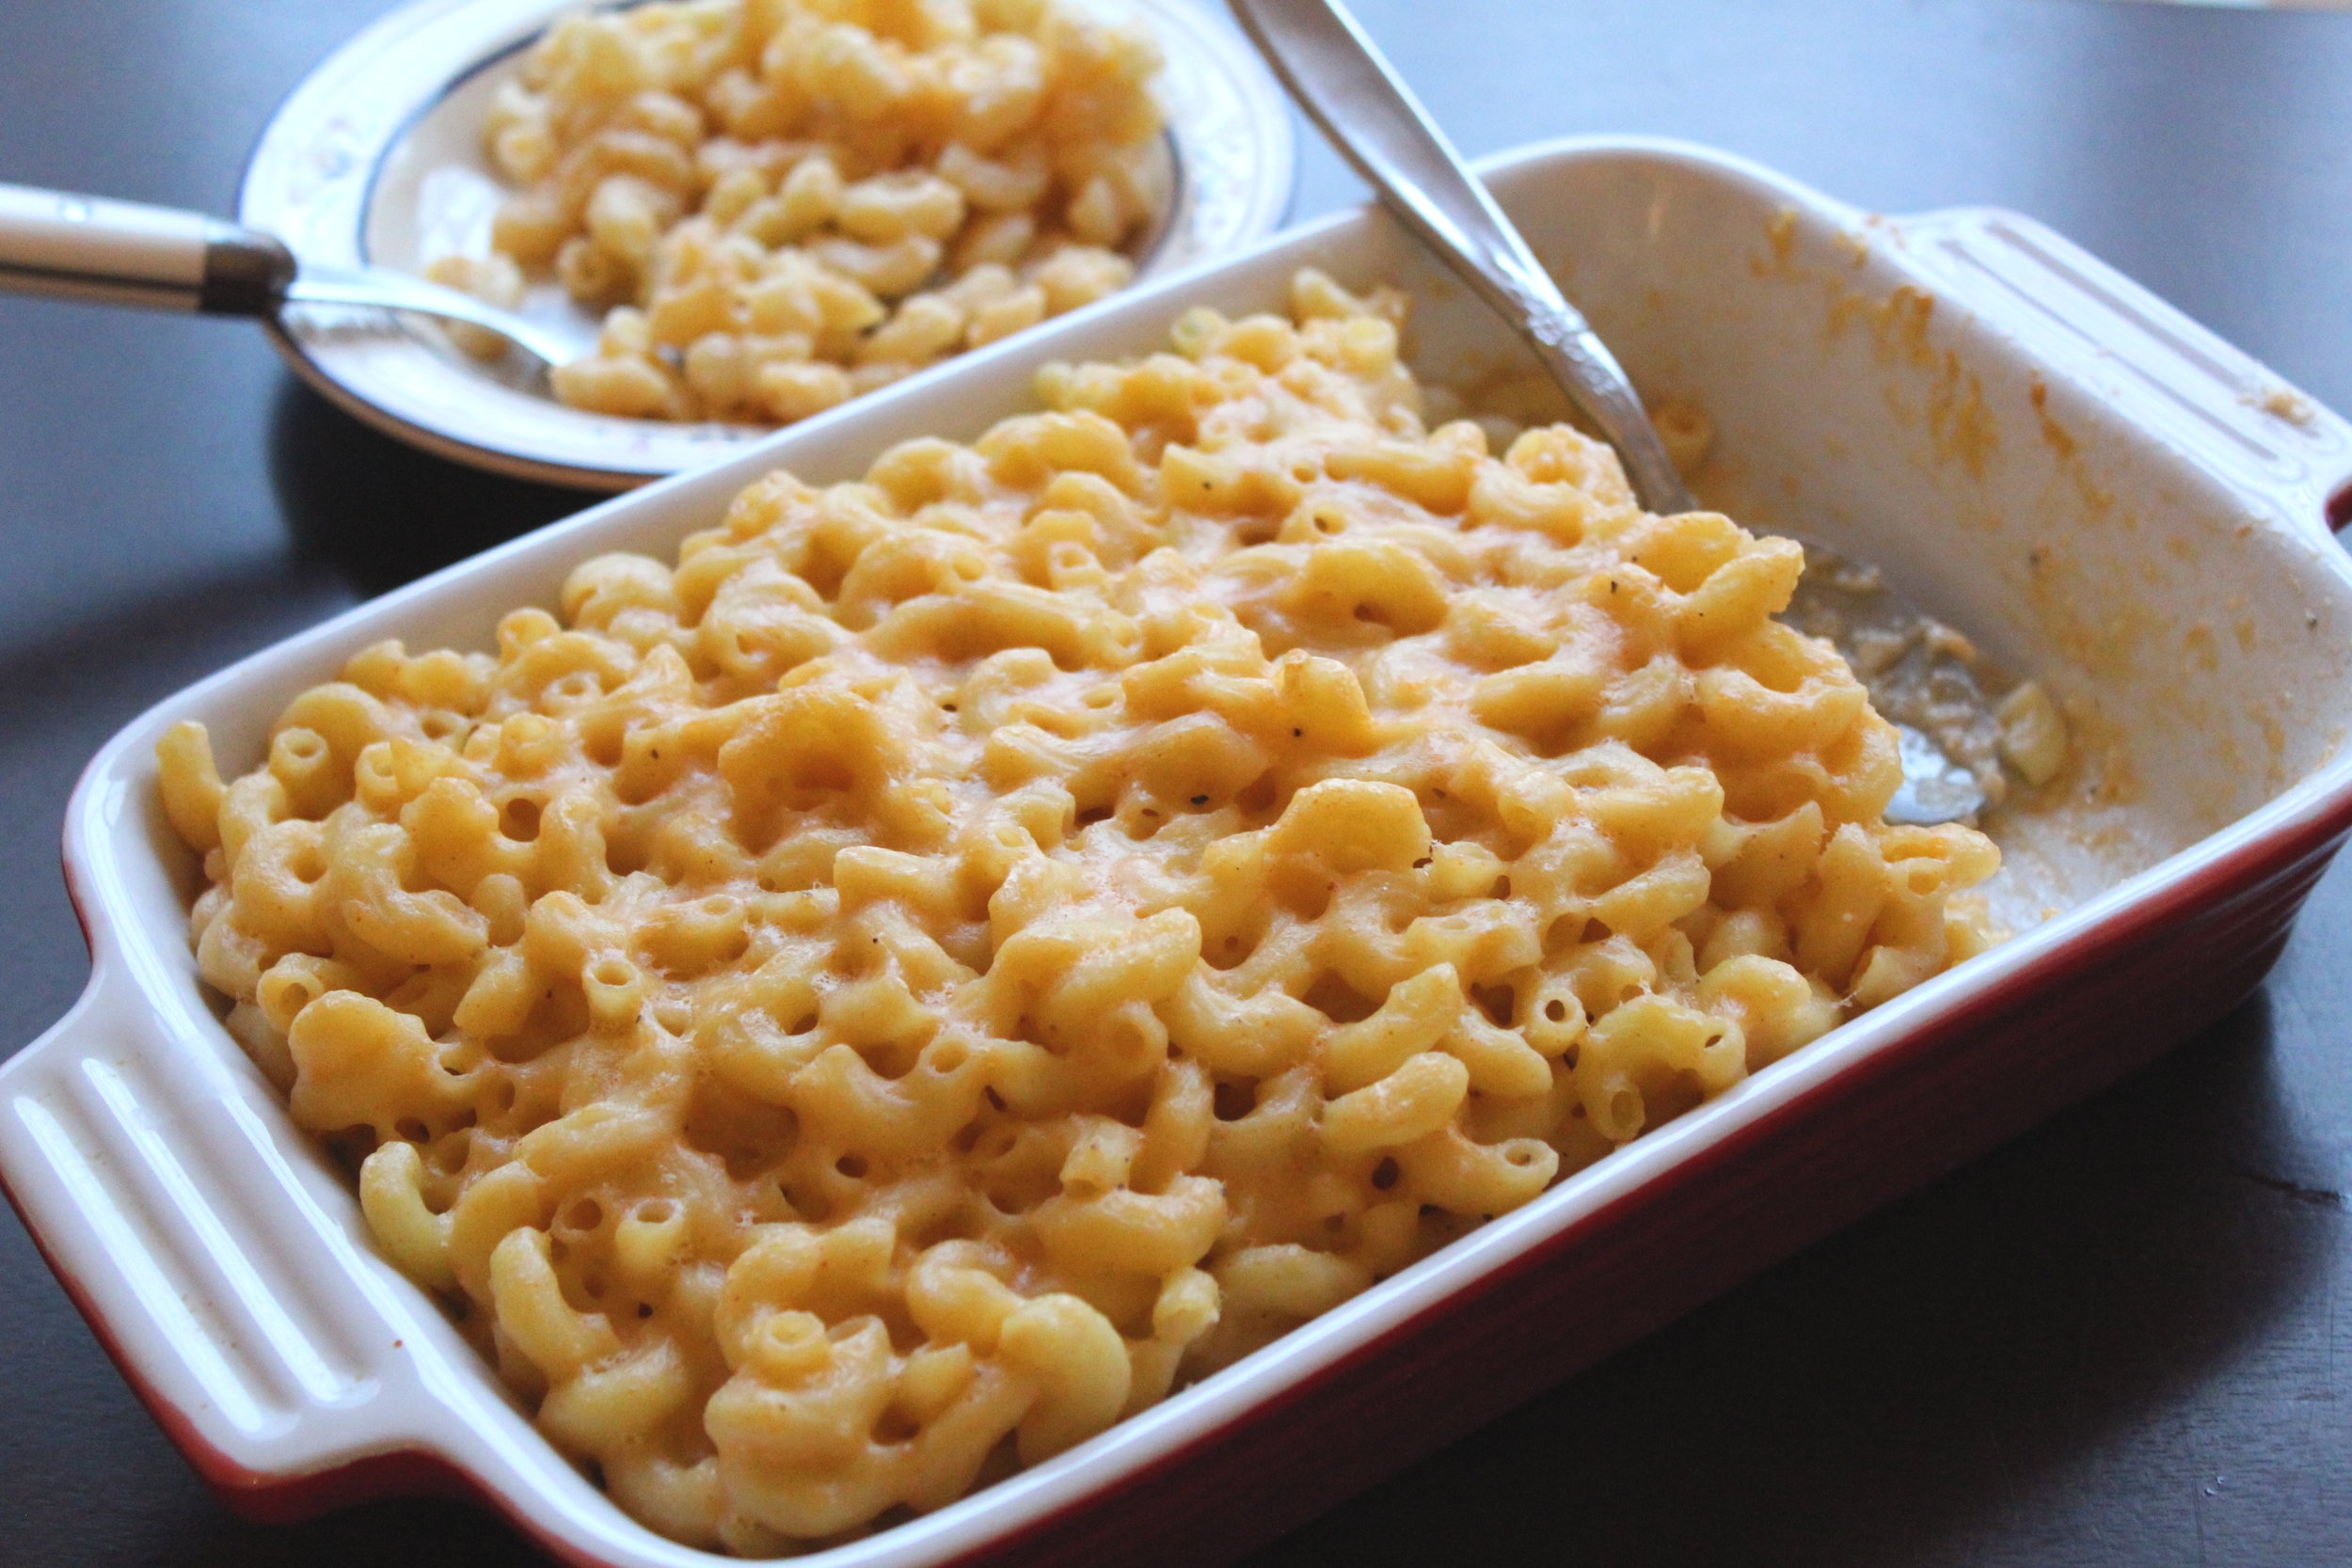
I’ll admit it. I have a serious addiction to cheese. I have loved cheese ever since I took my first bite out of a slice of cheese pizza from the local pizzeria near where I grew up in Brooklyn. I was only a kid then, but I became a fan of cheese for life. For as long as I can remember, I loved anything with cheese. Pizza, pasta, cheese crackers, cheese puffs, cheddar and sour cream chips – I craved all of them all the time. My love for cheese led me to make macaroni and cheese out of the blue and orange box for years during my college years. Other than instant ramen and instant mashed potatoes, I had stockpiles of instant macaroni and cheese in my college dorm room. I used to think good macaroni and cheese came straight from a box until I had the macaroni and cheese at Sava’s in Ann Arbor. Sava’s macaroni and cheese had cheddar, Parmigiano Reggiano, and smoked gouda. The combination of cheeses was unlike any macaroni and cheese I ever had. It was salty, creamy, and smoky all at the same time. I kept going back to Sava’s almost monthly throughout college. After I graduated from college and no longer lived near Sava’s, I made my own version of three cheese macaroni and cheese. It took me a couple of tries, but I finally nailed the flavors of the macaroni and cheese I remembered so distinctly when eating at Sava’s. My three cheese macaroni and cheese became my go-to macaroni and cheese of choice until last weekend. Last Saturday, I had a sudden craving for macaroni and cheese. I checked my refrigerator and only had cheddar cheese and Parmigiano Reggiano cheese. I checked my pantry and only had elbow pasta. Instead of my usual three cheese macaroni and cheese using tortiglioni or cavatappi pasta, I made a two cheese version using the two cheeses I had on hand and some elbow pasta. I also seasoned the macaroni and cheese with garlic powder, paprika, and mustard powder. Suddenly, my seasoned two cheese macaroni and cheese was born. My seasoned two cheese macaroni and cheese had all of the flavors I loved in macaroni and cheese and more.

Read More
Tags: savory
Comment
IMG_0705.JPG

Spiced BBQ Spare Ribs

June 16, 2019

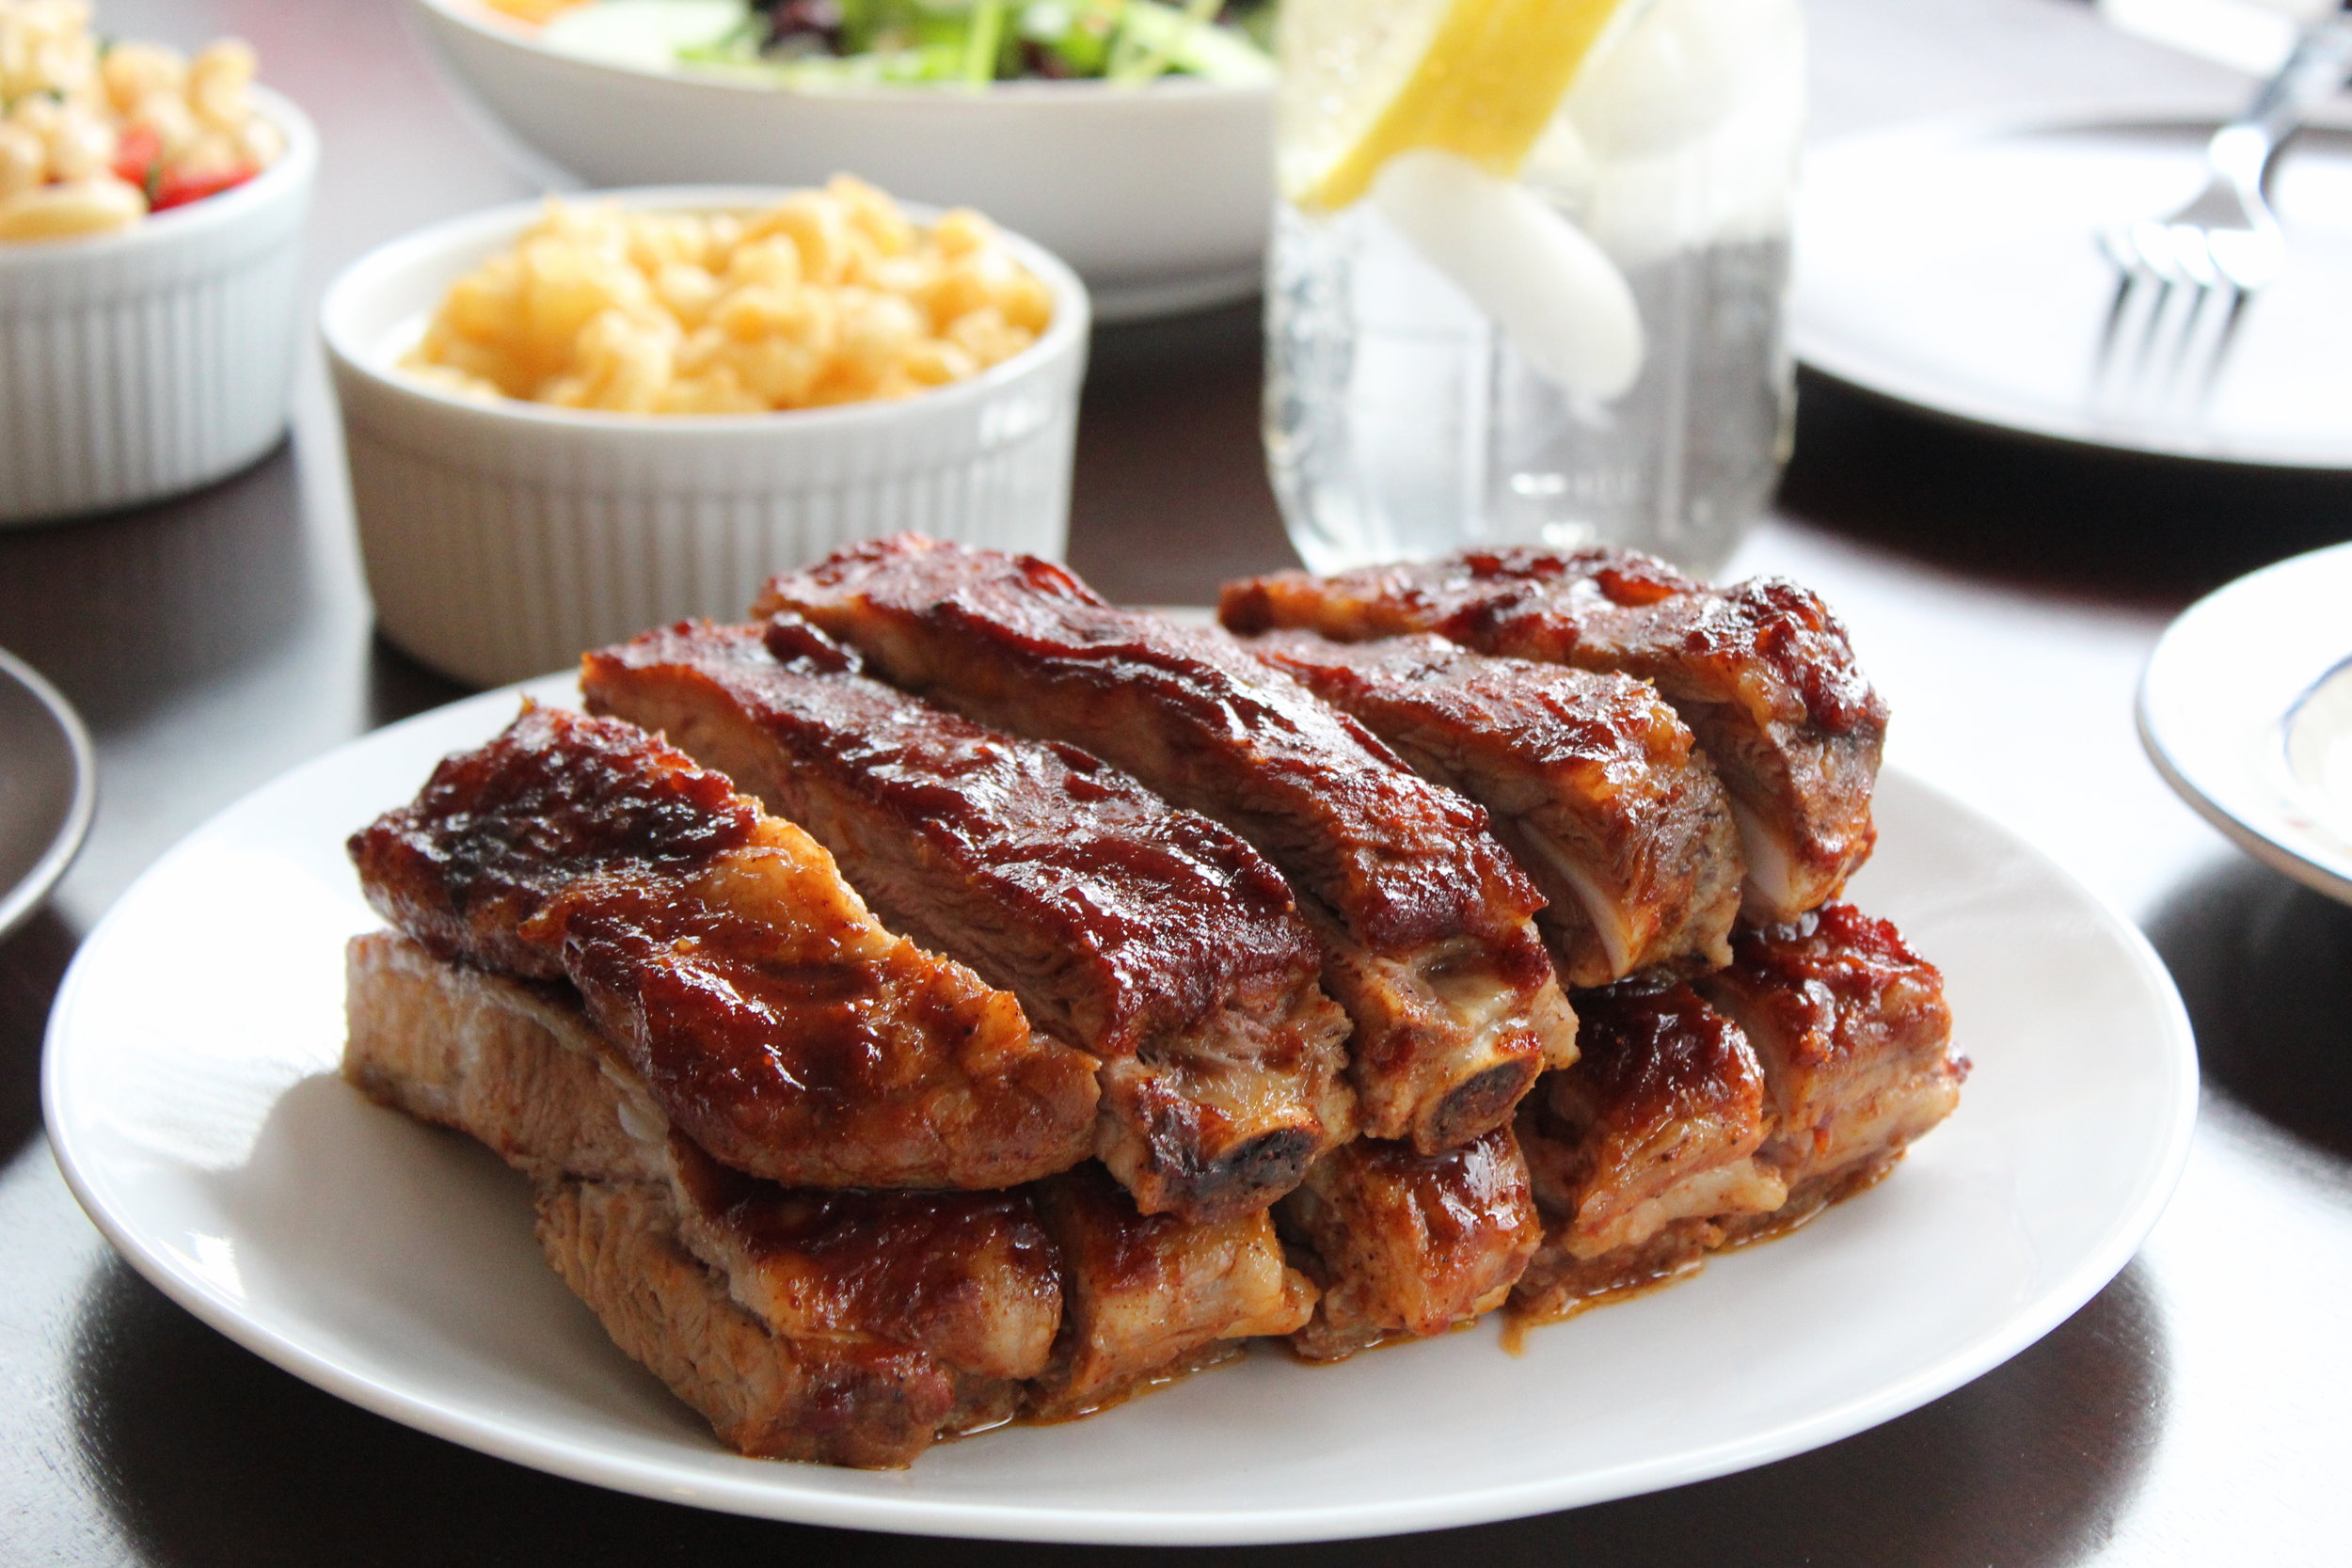
Ohio has been hit with quite a bit of rain over the last few days. Just this Saturday, there were major thunderstorms hitting the Southwest Ohio area. During these rainy days, I like to stay inside and test out new recipes. One of the recipes I am excited to share today is a variation on my sweet and sticky spare ribs inspired by my mom’s version. My mom’s sweet and sticky spare ribs will always be a favorite in the Pan household. My twist on the sweet and sticky spare ribs is my spiced BBQ spare ribs. I ended up making some spiced BBQ spare ribs after a few weeks of experimenting with a dry rub spice mixture. My dry rub spice mixture combines paprika, garlic powder, chili powder, smoked paprika, sugar, salt, and black pepper. Once added to the spare ribs, the spice mixture infused such a wonderful smoky, sweet, and savory flavor to the spare ribs. Over the last month, I have been in recipe development mode in between work, class, and projects. Many of the recipes I’ve been working on this month are either variations on barbecued meats, or variations on my favorite sides usually served with barbecued meats. When the month of June rolls around, I always seem to crave barbecued or smoked meats and all of the fix-ins and sides. Part of the reason could be the endless advertisements for barbecue flashing across my television screen. Mostly, I just want foods infused with smoke flavor. My barbecue cravings this month led to the development of my spiced BBQ spare ribs. I have been experimenting with different spice mixtures to find the right balance of spicy, tangy, smoky, sweet, and savory flavor. I initially tested the spice rub mixture on chicken wings, but today, I had a rack of spare ribs and decided to test the spice rub mixture directly on the spare ribs. I started by rubbing a handful of the spice mixture all over the spare ribs. Then, I covered up the spare ribs and allowed the spare ribs to sit in the spice rub mixture for a couple hours in the fridge. When I was ready to cook the spare ribs, I whipped out my favorite barbecue sauce and brushed on a layer of barbecue sauce before placing the spare ribs in a foil lined baking pan and popping the ribs into the oven to cook away. Halfway through the cooking process, I removed the spare ribs from the oven, brushed on additional barbecue sauce, and placed the spare ribs back in the oven. One hour later, the spare ribs were ready for serving alongside some macaroni and cheese and tomato basil pasta salad. The spare ribs turned out fantastic. It had all of the flavors I was looking for in my favorite barbecued meats – sweet, spicy, smoky, and salty. I just needed to prepare some macaroni and cheese, pasta salad, side salad, and some s’mores to round out the rest of my meal.

Read More
Tags: savory
Comment
IMG_0059.JPG

Tomato Basil Pasta Salad

June 11, 2019

Summer is in full swing. I know summer has arrived when the temperature at my office is adjusted to the coldest levels, people all around are wearing short sleeve shirts and pretty florals, and pesky mosquitoes seem to find their way to me. Even with spraying on tons of bug repellent, I can’t seem to hide from mosquitoes. When it comes to the frigid temperatures at my office, I always wear a cardigan or bring along a sweater because I always end up getting cold an hour into the work day. Over the weekend, I even started to take out all of my summer clothes (shirts, shorts, and swimsuits). The warmer weather has even encouraged me to cook lighter meals (featuring tons of colors), eat healthier, and hit the gym more often. The first two goals are easier to accomplish than the last, but I still try my absolute best to squeeze in more exercise over the summer. One of my favorite dishes to make during the summer months is pasta salad. Pasta salad is super easy to prepare, quick to assemble, and tastes amazing after chilling in the refrigerator for anywhere from half an hour to a few hours. I sometimes get impatient and serve myself a scoop or two of pasta salad after only letting it chill in the refrigerator for half an hour. If you have the will power, definitely let the pasta salad chill for a few hours to develop the best flavor. Instead of my usual  pasta salad with Italian dressing, I simplified the pasta salad to just cherry tomatoes, and thinly sliced fresh basil. The dressing for the pasta salad was also simplified to only five ingredients – olive oil, vegetable oil, red wine vinegar, kosher salt, and freshly cracked black pepper. The only real cooking involved is cooking the tricolor penne pasta just shy of al dente. Once ready, the pasta is drained, tossed in a large bowl with tomatoes, basil, and a simple red wine vinaigrette. The entire bowl is then transferred over to the refrigerator to chill for a few hours. The chilling time not only cools the pasta salad, but also gives the pasta salad time to develop all of its flavors. Pasta salad is one of those dishes where the longer it sits, the better it gets.  The red wine vinaigrette seeps into the tomatoes and adds a delicious tanginess to the already sweet cherry tomatoes. The pasta salad is also stunning to look at and makes for a great summer picnic salad.

Read More
Tags: savory
Comment
IMG_0091.JPG

BBQ Hot Chicken, Pickles, and Gorgonzola Pizza

June 09, 2019

This weekend, I made the most amazing pizza topped with barbecue sauce, homemade crispy hot chicken, Gorgonzola cheese, and pickles. I was first introduced to hot chicken several years ago when I moved to Ohio. Shortly after moving to Ohio, I spent one weekend exploring the area and traveled to the North Market on Spruce Street for some grocery shopping at the farmer’s market there. While browsing through the nifty shops both inside and outside of North Market, I wandered upstairs to a restaurant on the second floor with a long line of people waiting to purchase hot chicken. My curiosity got the better of me and I quickly googled the restaurant, Hot Chicken Takeover, on my phone. When I saw all of the positive reviews, I decided to join the line and give the place a try. Despite the amount of people, the line moved quickly. When it was my turn to order, I ordered some chicken breasts with a medium spice level and got my first introduction to hot chicken. The chicken was spicy, but not too spicy and the pickles added a nice contrast to the chicken. Each order came with a Styrofoam box filled with hot chicken, pickles, and white bread. The establishment also served free unsweetened and sweetened tea. I grabbed a cup, filled it almost to the rim with some unsweetened tea and sat on the tables on the second level to enjoy my lunch. The chicken along with the pickles and white bread made for the most satisfying hot chicken experience. Fast forward to this weekend, I suddenly had cravings for hot chicken and pickles. I was nowhere near Hot Chicken Takeover and instead of trekking all the way to get some hot chicken, I decided to make my own version of hot chicken at home. To accompany the hot chicken, I cut up some pickles, paired the combination with some barbecue sauce and Gorgonzola cheese and placed all of the ingredients on my homemade pizza dough. I popped the pizza on a sheet of parchment paper and placed the pizza on top of a pizza stone in my home oven. In thirteen minutes, I had the most amazing BBQ hot chicken, pickles, and Gorgonzola pizza. The pizza turned out fantastic. The hot chicken added a crispiness and spiciness. The pickles added a wonderful tangy crunch. The barbecue sauce added a sweetness and smokiness. The Gorgonzola cheese added a creaminess and bite.

Read More
Tags: savory
Comment
IMG_9724.JPG

Blueberry Cinnamon Crumb Cake

June 05, 2019

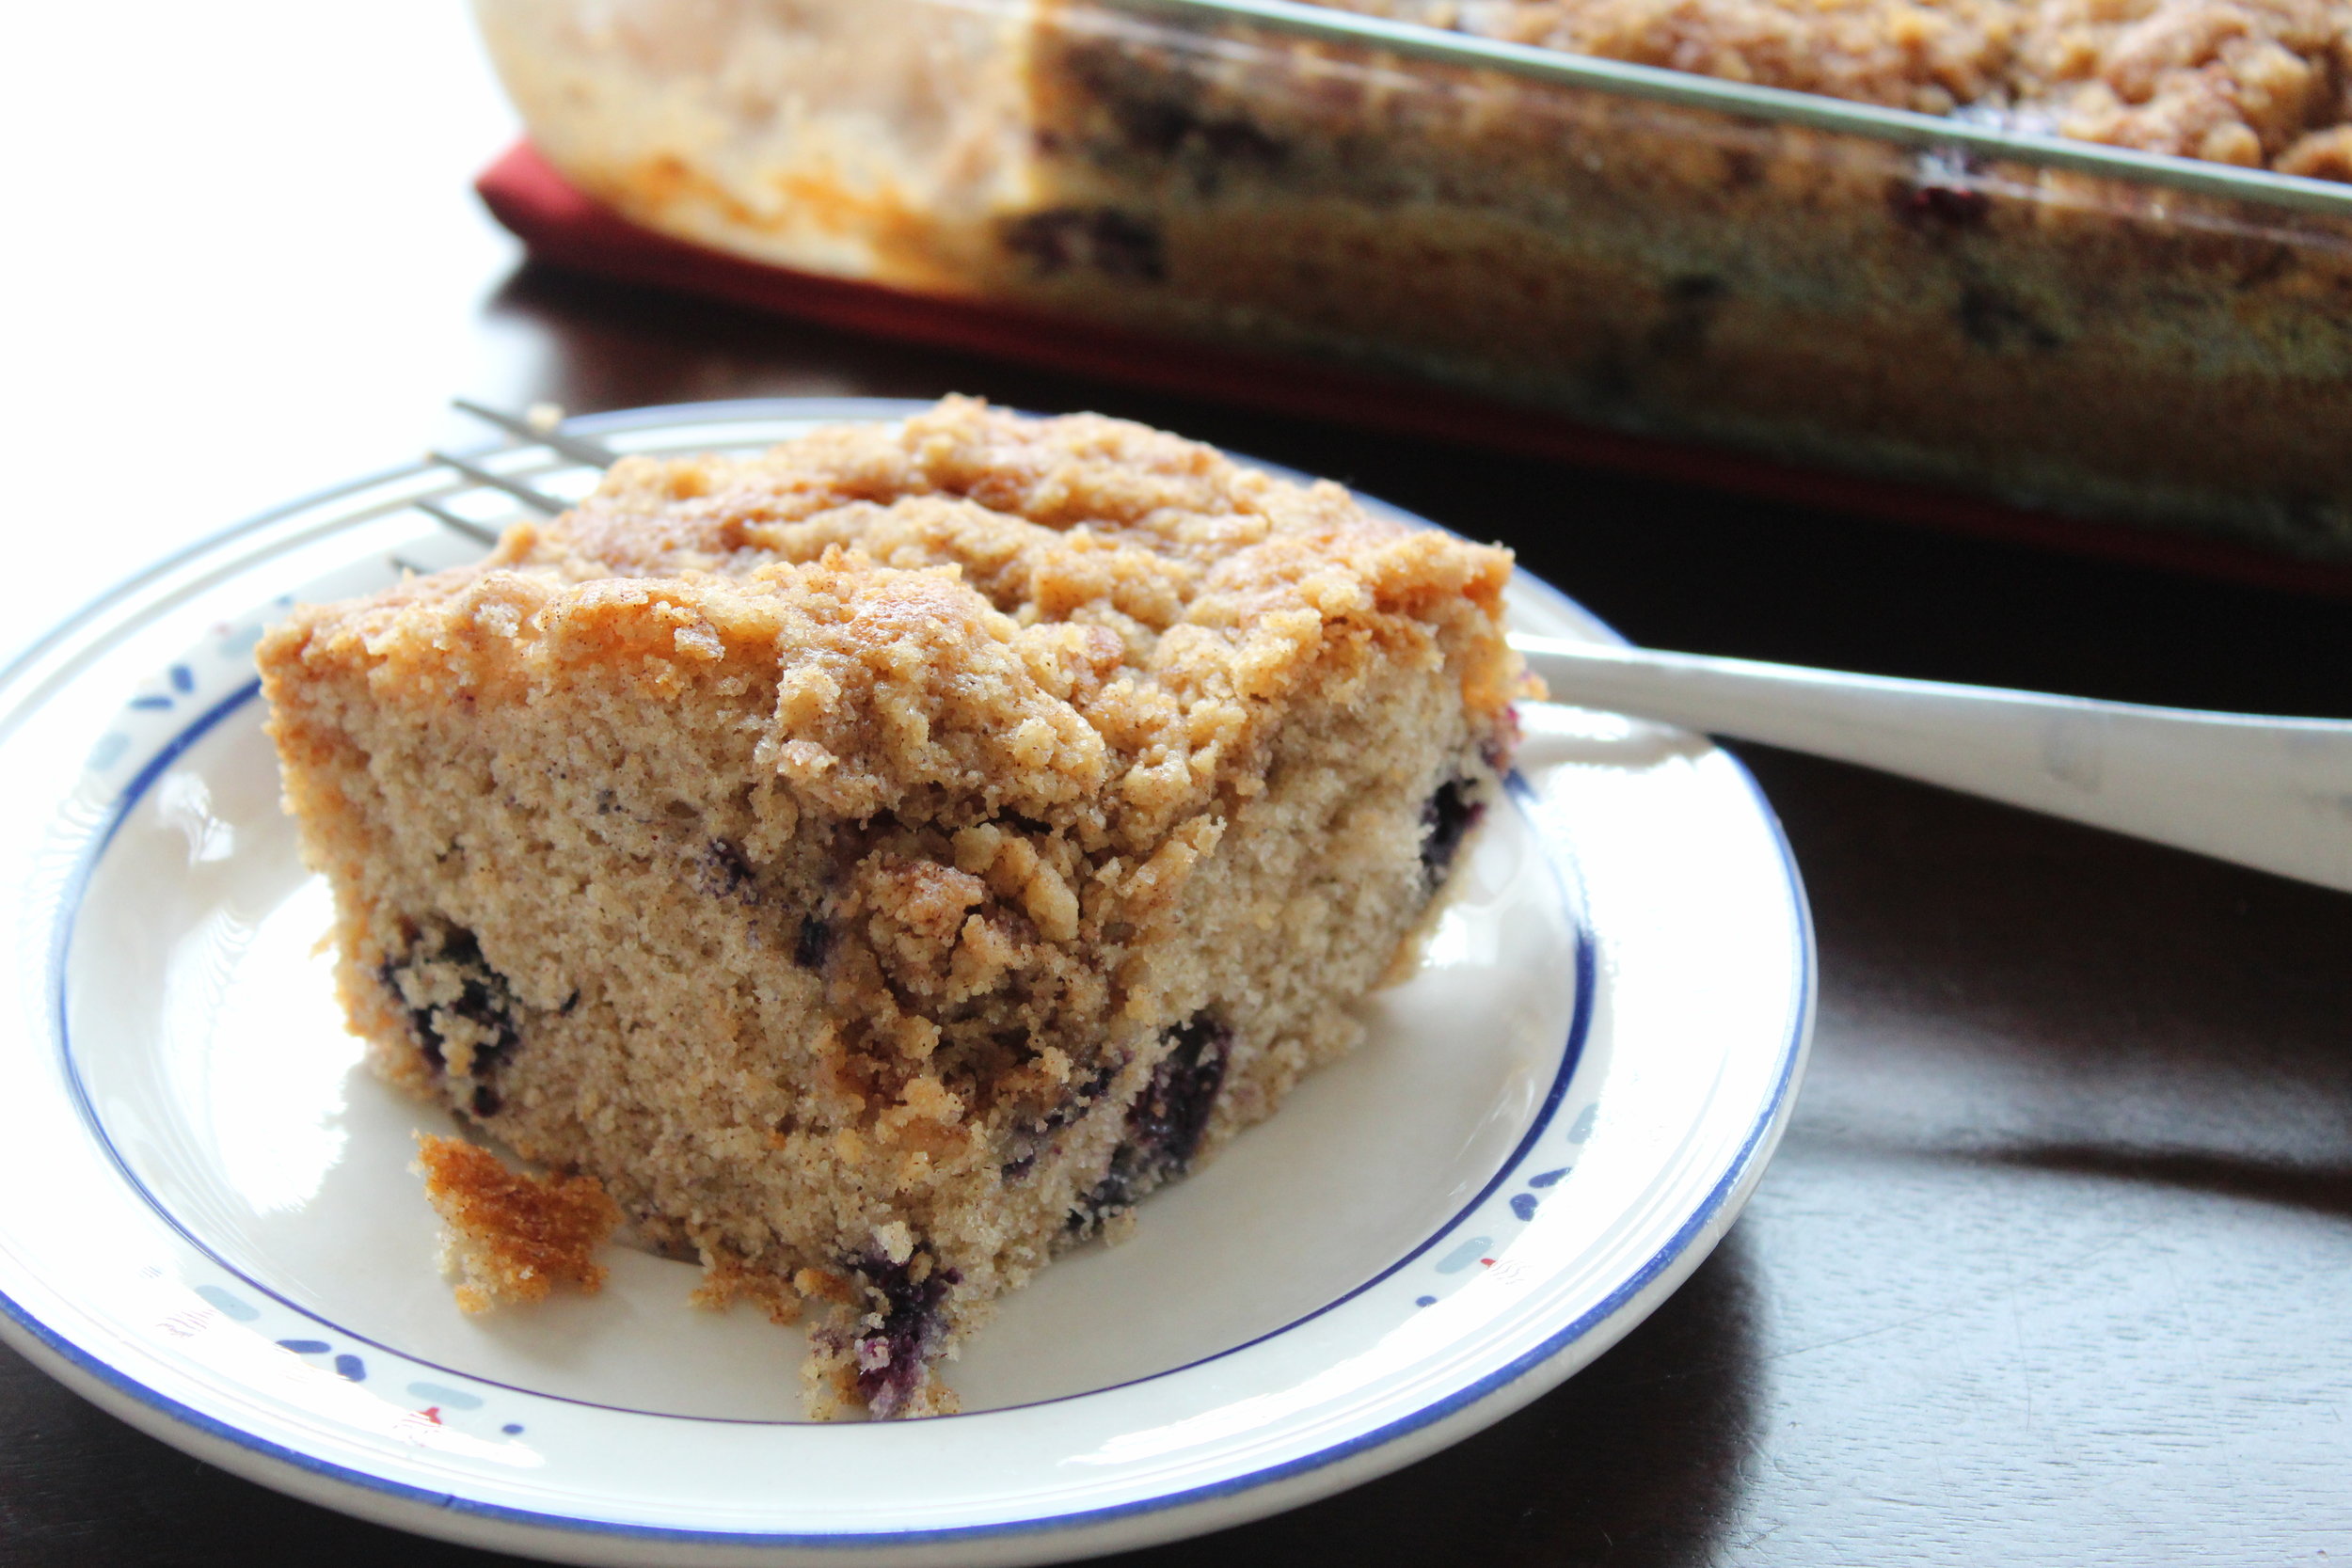
We’ve finally been struck with a heatwave in Ohio. The temperature went from slightly cool in early May to hot and humid by the end of May. The heat has continued into this week. The weather in Ohio has definitely reminded me summer is here. One of the goals I set for this summer is to learn how to take better photos with my Canon EOS Rebel T6 DSLR camera. I recently enrolled in two online photography courses and have been applying what I learned from the two courses to the photos I take throughout the week. Today, I am taking a break from capturing photos to share a recipe for one of my all-time favorite breakfast treats – my blueberry cinnamon crumb cake. Although I’m not usually a fan of cakes on the sweeter side, I do make an exception for crumb cakes. I love the balance of textures in a crumb cake. You have the fluffy cake as a base and then the crisp crumb on top. The cake is scrumptious, bursting with fresh blueberries, brimming with warm cinnamon, and has the most amazing crumb topping ever. It’s also super easy to whip together for a quick breakfast, simple dessert, or sweet treat. Over the last few years, I’ve made variations of crumb cakes quite a bit. During the holidays, I like to incorporate seasonal spices into crumb cakes. My pumpkin spice crumb cake was the result of one of my experiments in the kitchen during the holidays. Throughout the rest of the year though, I prefer a simpler crumb cake filled with fresh blueberries and ground cinnamon. The combination of fresh blueberries and warm cinnamon has been one of my favorite flavor profiles in baked treats since childhood. The blueberries add a wonderful pop of sweetness and freshness to the cake. The cinnamon adds a nice spice and fragrant flavor to the rest of the cake. The crumb cake itself takes less than an hour to assemble, bake, and serve. I like to eat a piece here and there throughout the day and always with a cup of freshly brewed hot tea.

Read More
Tags: sweet
Comment
IMG_9789.JPG

Chicken Wing Vermicelli Bowls

June 03, 2019

I am finally back to my normal eating and sleeping schedule. It has been almost two weeks since Kevin and I returned back to Ohio from our honeymoon in Italy and we already miss the endless supply of carbs (mostly pasta and pizza). We had to run quite a bit of errands over the weekend and stopped just long enough to savor some chicken wing vermicelli bowls. Vermicelli bowls are one of my favorite bowls to order whenever I eat at a Vietnamese restaurant. Growing up in Brooklyn, I grew accustomed to the ease of access I had to the local Vietnamese restaurant right by where my family lived. Whenever I had a craving for Vietnamese food, I would stop by the local restaurant and order myself a chicken, pork, or shrimp vermicelli bowl. Oftentimes, I may even order some summer and/or spring rolls. When I moved to Ohio, I missed the easy access I had to Vietnamese food immensely. If I wanted a good vermicelli bowl, I had to either drive quite a bit to the nearest Vietnamese restaurant to get my fix or make my own at home. I opted to make my own vermicelli bowls over the weekend using some chicken wings I had in my refrigerator. I started by marinating some chicken wings in a blend of my favorite Asian sauces. While the chicken wings were marinating, I prepared the lettuce, carrot, cucumber, cilantro, and vermicelli noodles for adding to my bowl. The base of my favorite vermicelli bowls always includes a combination of these ingredients cut into small pieces. Most of the elements of the vermicelli bowl are served cold. The protein, in this case, chicken wings, are the only items served hot. Once I finished preparing the cold ingredients, I cooked the chicken wings until golden brown in color. Depending on my mood, I would alternate between picking chicken, pork, or shrimp as the protein of choice for my vermicelli bowls. I put my own spin this time around by adding chicken wings. Vermicelli bowls are typically served with a side of sweet vinegar sauce. Instead of the sweet vinegar sauce, I topped my bowls with some sriracha, hoisin sauce, and soy sauce.

Read More
Tags: savory
Comment
Prev / Next
FBPP2.jpg

Hello! My name is Jia Pan and I love to experiment with food. My site is a collection of recipes and stories chronicling my adventures in the kitchen and around the world.
Read More


No results found

Featured Recipes

Featured
Fall Adventures in New England + Parm Herb Roasted Veggie Sandwiches
November 9, 2025
Fall Adventures in New England + Parm Herb Roasted Veggie Sandwiches
November 9, 2025

November 9, 2025

Everyone who knows me knows that I love fall. It’s my favorite season of the year. Not only is the weather the perfect amount of chilly without being overly chilly, I always eagerly look forward to the endless fun festivities associated with fall. October is the month that I especially look forward to because of spooky season. Now that Z is almost 3½ years old, she has begun voicing how much she loves the fall. To be fair, Z has been a fan of cooler weather for as long as I can remember. In the winter, you can for sure find her outside playing in the snow for far longer than we’d like. This past month of October has been an especially fun month for Z. The excitement only grew as the weeks went on leading up to Halloween. One perk about living in New England is just the sheer amount of Halloween events taking place in not only my town but also all the neighboring towns. We started October off with attending the Topsfield Fair, which always takes place the first weekend of October. We like to go yearly because there are always tons of activities for everyone in the family, especially the little ones. Z enjoys seeing the variety of live animals and the large pumpkins. Kev always wants to scout out the food vendors. I enjoy going for the atmosphere and to watch the joy on Z’s face as she interacts with the animals and exhibits. During the last two weeks of October, we’ve gone to a few Halloween events in our town and in the surrounding towns. Z’s favorite Halloween activity so far has been trick-or-treating. She loves collecting little pieces of candy and toys and filling up her tote bag with the varied treats and toys. To help keep us fortified throughout our October adventures, I’ve been preparing parm herb roasted veggie sandwiches for Z and I. The roasted vegetables are super easy to make in the oven, and I like to serve them on homemade parm herb bread that I prepare in advance. Speaking of, I have one loaf ready to go that is currently sitting in my freezer. I developed my version of parm herb bread a few years ago during the pandemic (when we spent most, if not all, of our time indoors). It’s great on its own but is made even better when topped with some roasted veggies and herbed cheese. I was inspired by this specific version of a roasted veggie sandwich ever since I had a fantastic veggie sandwich for a catered work lunch. The version I ate included a lot of warmed roasted veggies and goat cheese and was served on a cheese topped focaccia. The warmed roasted veggies were tossed with a balsamic vinaigrette, which altogether made the sandwich just delightful to eat. The textural contrast of the soft, fluffy bread, crunchy veggies, tangy sauce, and creamy cheese made the experience unforgettable. Ever since, I’ve been trying to recreate a similar version of the sandwich I ate on the work trip at home. A few times throughout the year, I like to plan a picnic for just Z and I, and so when I was planning such picnic during a crisp fall morning, it made perfect sense to incorporate these roasted veggie sandwiches into the menu. All of these picnics with Z also inspired me to create her latest Halloween “picnic” costume. I even made a matching outfit for myself to match Z. We then dressed up in our “picnic” outfits to enjoy our picnic outdoors. The best part about these sandwiches is that they are super easy to prepare once you’ve taken the extra step to prepare a couple of these homemade parm herb breads ahead of time. For the cheese component on the sandwich, I swapped out goat cheese (which Z doesn’t enjoy) and used Boursin garlic & fine herbs cheese instead (which Z loves). Dare I say that my version of roasted veggie sandwiches is even better than the one I had on my work trip!

Read more →
November 9, 2025
Tea Party for Three + Heart-Shaped Jam Cookies
June 29, 2025
Tea Party for Three + Heart-Shaped Jam Cookies
June 29, 2025

June 29, 2025

Some of you may know that May is an especially exciting month for our family. Not only because May is when we finally get to experience warmer weather, but it’s also the month where we celebrate all three of our birthdays. For Kev and I, we usually just go out to a local restaurant to eat dinner and then go back home and retreat into our favorite corners of our couch to relax. For Z, though, we had to make sure that we celebrated her birthday in a special way. Since I’ve been working on recreating some of my favorite foods to enjoy during afternoon tea, it made perfect sense to celebrate Z’s birthday with a tea party that features some of her favorite foods. A fruit platter is a no-brainer—it’s a healthy treat that we make for her every year for her birthday. While Z has become a bit pickier with new foods that we introduce to her, she almost never feels this way about fruits. No matter what fruits we serve her, she’s usually happy to eat them. Aside from the birthday fruit platter, I also try to create a sweet treat for her birthday each year. For her birthday tea party this year, I added additional foods that we typically love to serve with tea. Some of these foods include raisin and currant scones, curried chicken salad on cinnamon raisin bread, vegetable cream cheese on Asiago cheese bread, and heart-shaped jam pinky print cookies (similar in concept to thumb print cookies). The heart-shaped jam cookies are a new treat for this year, one that I created specifically to celebrate her third birthday. Over the years, I’ve created special treats to celebrate each of her birthdays. For her first birthday, I whipped up a batch of dragon fruit strawberry cupcakes and cake pops. For her second birthday, I made some wild blueberry whoopie pies. For her third birthday this year, Z helped me with making a batch of heart-shaped jam cookies. These cookies are loosely inspired by the ever-popular thumb print cookies. For my version, I used my pinky to form a heart shape instead of a thumb to form a circle. These cookies differ from other thumb print cookies in that they are more reminiscent of buttery shortbread cookies than typical thumb print cookies. For the jam filling, I used raspberry jam, a favorite of Z’s. With Z’s insistence on helping me with prepping the cookies, the kitchen has definitely become a lot messier in the process. The base of the cookies is very simple to make. I combine the ingredients in one bowl, roll and flatten the dough into circular cookies, and then use my pinky to press an imprint onto each piece of cookie dough twice, leaning right diagonally and then leaning left diagonally to form a heart shape. Z tried to help with this process and pressed her little fingers unevenly into the cookie dough. The heart shapes from Z’s pinky turned out too small, so I had to adjust some of the cookies to make sure they were consistent in shape and size. Once shaped, I popped the cookie dough into the refrigerator to chill for 15 minutes. As the cookies were chilling in the fridge, I preheated the oven. Once the cookie dough was ready, we removed them from the refrigerator and filled them with raspberry jam. I tried to fill just enough jam in each cookie to prevent the jam from spilling during the baking process. I then popped the baking sheet with the jam-filled cookies into the oven to let the cookies bake for just about ten minutes. Given how quickly the cookies bake up in the oven, I had to keep an eye on them to make sure the edges do not become too brown. Once the cookies are done baking, I remove them from the oven and let them cool while I started on preparing the other food items for the tea party. The other food items did take a bit of time to put together and arrange, but the tea party was definitely worth it just to see the smile on Z’s face. We all enjoyed the light bites and fresh fruit while we sipped tea and read Z a new book that we gifted her for her birthday this year.  

Read more →
June 29, 2025
Winter Adventures and Maple Blueberry Muffins
March 9, 2025
Winter Adventures and Maple Blueberry Muffins
March 9, 2025

March 9, 2025

Winter in New England this year has been brutal. We’ve had multiple weeks of frigid temperatures and snowy days. While I mostly enjoy the snowfall, the most difficult part has been the effect of the cold temp on my working hands. No matter how much lotion I lather on, it never seems to be enough to keep my hands from cracking. That aside, Z has been absolutely loving the snow days. She would often eagerly await the snowfall just to play outside. On snow days, I can see her eyes light up when she sees piles upon piles of snow outside the window. The moment she steps foot outdoors, she doesn’t want to come back inside. I’ve deeply appreciated all of the precious moments I’ve been able to experience watching her find joy in winter weather. In between shuttling her to and from school and going to work myself, I’ve been working on another recipe to share on my site that features two ingredients unique to New England. The first ingredient is wild blueberries. I’m using the frozen kind from Wyman’s since I can more easily get them at the local Market Basket and Stop & Shop. The second ingredient is maple syrup that I’ve had the pleasure of getting in person at Ben’s Sugar Shack up in New Hampshire. These ingredients are featured in my recipe for maple blueberry muffins. While experimenting with the ratio of ingredients for my maple blueberry muffins, I found that just adding maple syrup is not enough to give the muffins the distinctive maple flavor and aroma. I definitely needed to add a couple teaspoons of maple extract to help the maple flavor shine in these muffins. Once I made that breakthrough, I was able to produce muffins with a lovely maple flavor. Most muffin recipes ask for cupcake liners to be filled halfway or three-quarter way full, but for these muffins, I like to fill the cupcake liners to the very top. This way, once baked, the muffins spill over and end up with the look of true muffins. Another trick I learned during my experiments is the importance of using a mixture of mashed and whole blueberries. Mashing the blueberries helps to give the muffins a stronger and more prevalent blueberry flavor. For this recipe, I used a combination of mashed fresh blueberries and frozen wild blueberries. Just a note on Wyman’s wild blueberries: I started incorporating these blueberries into my baked goods when I discovered them at a local Stop & Shop shortly after moving to Massachusetts. These frozen wild blueberries tend to be smaller and have a much more intense blueberry flavor than standard blueberries. I’ve used them extensively when making my wild blueberry whoopie pies and like to incorporate them into baked goods that ask for blueberries. Not only do these muffins have an intense blueberry flavor that honor the flavor profile of blueberry muffins, but the maple flavor also shines through with the addition of both the syrup and extract. I’ll admit that even before moving to New England, I loved using maple syrup in pretty much everything I make. Maple syrup has a clean sweet flavor and works beautifully as a sweetener for sauces, dips, and milk tea. Since moving to Massachusetts, I find myself adding maple syrup to pretty much everything. Once a year, during Maple Weekends here in New England, I travel up north to stock up on maple syrup. When March rolled around this year, we drove up north again to stock up on maple products from Ben’s Sugar Shack. Ben’s Sugar Shack is a well-known local producer of maple syrup located in New Hampshire and has become our go-to shop for maple syrup. Earlier this month, we got a refresher on how maple syrup is produced, enjoyed some samples of maple products, and stocked up on a few bottles of maple syrup all from Ben’s. Aside from just maple syrup, Ben’s also carries maple-flavored snacks. Kev usually heads for the snack section to get his fix of maple leaf crème cookies while my snack of choice is Cabot’s maple cheddar popcorn, a nod to New England that reminds me so much of Garett’s popcorn in Chicago (I even recreated them here). Though, that’s a story for another time. Once we loaded up on maple syrup (and an assorted array of maple-flavored treats) for the year, I got right back to work to make a batch of my maple blueberry muffins, the perfect little treat for breakfast, brunch, and snack on weekdays. As you can see in the photos above, Z is absolutely fascinated by the production of maple syrup. It also doesn’t hurt that the maple syrup treats are so addictive. When I started making maple blueberry muffins, she kept coming back for more and more. She often asks for them in the morning every few days. Luckily for us, during recipe development and testing, we all benefit from having large batches of muffins baked up and ready to go on those mornings where no one can be bothered to make breakfast. These maple blueberry muffins do the trick of filling our grumbling bellies and holding us over until lunch time.

Read more →
March 9, 2025
Summer and Fall Adventures and Cinnamon Roll Scones
October 27, 2024
Summer and Fall Adventures and Cinnamon Roll Scones
October 27, 2024

October 27, 2024

As summer comes to an end here in New England, we’ve been slowly adjusting back to the pace of a new school year. We’ve had a fairly packed summer with Z including weekend trips to Crane Beach, fruit picking at local farms, visits to museums and historic homes in nearby states, and a trip to a sunflower field packed with towering blooms. When September rolled around, Z started attending school full-time on weekdays, which meant cooking and baking a little bit more on weekends to ensure she has food the next day for lunch. Her school lunches typically feature a range of foods from each food group. Packing lunches for Z also gave me a reason to get back to recipe development mode more consistently. One recipe I’ve been working on over the last couple of months is a twist on cinnamon rolls and scones. Whenever fall arrives, I always look forward to the flavors of warming spices, most notably cinnamon and nutmeg. Cinnamon and nutmeg seem to make their way into most baked treats and drinks I crave during these cooler months. A baked treat I find myself craving often during the fall is cinnamon rolls. I’ve loved the flavors of cinnamon rolls ever since childhood and wanted to find a way to repurpose these classic morning treats into another treat. My experiments led me to the creation of cinnamon roll scones or cinnascones. Essentially, my cinnamon roll scones combine my love for both treats into one. This recipe has all the flavors of a cinnamon roll in the time it takes to make scones. Honestly though, it does take slightly longer to make cinnamon roll scones compared to typical scones because of the added component of the cinnamon-sugar-butter filling that is rolled into the cinnamon roll scones. I usually make the filling or paste ahead of time and leave it to cool as I start the next step of prepping the dough for the scones. One benefit of these cinnamon rolls is that they are less sweet than your traditional cinnamon rolls. When developing this recipe, I played around with the ratio of ingredients in my go-to scone recipe to get the proportions just right. Because of the added filling in the center of the scones, I had to reduce the amount of liquid I typically use to make scones. This prevents the scones from spreading too much when baking. The rest of the ingredients included in the scones are your usual ingredients—all-purpose flour, baking powder, baking soda, butter, sugar, salt, and milk. These cinnamon roll scones do include the addition of both vanilla and almond extract and both ground cinnamon and nutmeg. The additional extracts and spices work well together to create a symphony of complementary flavors. The combination of these flavors is what makes the cinnamon roll scones truly stand out. While testing and retesting this recipe at home in preparation for sharing on my site, Kev, Z, and I have benefited from enjoying multiple iterations of these cinnamon roll scones. We had some for breakfast, some throughout the day as snacks, and even some for dessert on occasions. These cinnamon roll scones have even made their way into Z’s bento box lunches a couple times. They store well in the fridge and have added a little bit of a fall touch to our days. Whenever I find my cravings kicking in, I turn to these cinnamon roll scones and a cup of drip coffee for a relaxing morning breakfast treat.

Read more →
October 27, 2024
Spring Celebrations and Wild Blueberry Whoopie Pies
June 23, 2024
Spring Celebrations and Wild Blueberry Whoopie Pies
June 23, 2024

June 23, 2024

Summer has finally arrived in New England. The transition from spring to summer brought us windy temps on some days and heat waves on others. The last couple of months have been especially exciting for our family as we traveled extensively throughout the New England area. Just this month, we headed up north to visit friends in Maine. A couple of months ago, in April, we made a special trip up north to New Hampshire and Vermont to witness the April 8th solar eclipse. In May, we headed west to visit some of the hidden gems located throughout the Berkshires. In between these trips, we celebrated our birthdays during the month of May. Since all three of our birthdays land in the month of May, we pretty much celebrated a birthday every week throughout the month of May. For Z’s birthday, we celebrated with an I Love You to The Moon and Back book theme. In between work and travels, I’ve been working on developing new recipes to share on my site. One recipe I’ve been working on lately has been my take on a classic New England treat I’ve had on multiple occasions on my trips up north. These treats are of course the cookie-shaped, cream-filled cakes known as whoopie pies. Despite the name, whoopie pies aren’t pies but are actually cakes shaped like giant cookies with cream sandwiched in between. They look pretty much like ginormous Oreo cookies. The ones here in New England are typically chocolate cakes with a marshmallow cream in the center. I find myself gravitating to these dessert pies every time I make a trip up north to Maine. On nearly every trip, we’ve defaulted to having lobster rolls and/or lobster bisque for lunch and rounded out the meal with whoopies pies for dessert. The whoopie pies I’ve eaten on my trips to Maine are always amazing. They are such beloved desserts that there are bakeries dedicated specifically to them. The taste reminds me of some of the packaged chocolate cream-filled snack cakes I would buy from the local grocery stores in Brooklyn throughout my childhood. When I set out to recreate these lovely little snack cakes, I wanted to combine a classic chocolate whoopie pie with the de facto Maine fruit, wild blueberries. Fresh wild blueberries aren’t easy to find where we live, but frozen wild blueberries are easily found in the freezer section of the local Stop & Shop near us. Since chocolate pairs beautifully with blueberries, it was only natural for me to combine my love for chocolate and blueberries into wild blueberry whoopie pies. My version of whoopie pies is a nod to the classic treat and the classic fruit of Maine. The best part about these whoopie pies is the portability. They are easy to tote around as a dessert after a meal, and they make for the perfect little celebration cakes for Z. The slight tartness of the wild blueberries helps to balance out the sweetness of the whoopie pies. Depending on where you get whoopie pies, the cake to filling ratio can vary drastically. Some whoopie pies are filled to the brim with filling, while others are not so much. When I recreated these treats, I tried to keep the ratio of cake to filling somewhere in the middle. Since these cakes are celebration cakes for Z, we wanted to make sure she got a full-size whoopie pie to herself. Z became a fan of these chocolatey treats ever since she set her little teeth on her first whoopie pie on our travels to Maine. When Z turned two last month, I baked up a batch of wild blueberry whoopie pies just for her to enjoy as birthday treats. We wanted her birthday theme this year to be a logical transition from last year’s birthday theme based on the book, The Wonderful Things You Will Be. With our recent travels to see the solar eclipse, I felt inspired to create a moon-themed birthday celebration. The logical choice was another one of Z’s favorite children’s book, I Love You to the Moon and Back. We obviously replaced “to” with “2” to keep with the 2nd birthday theme. As you can see in the photos throughout this post, Z thoroughly enjoyed her share of the wild blueberry whoopie pies on her birthday. She even asked for more of these little chocolate cakes on the days after her birthday.

Read more →
June 23, 2024
Winter Travels and Smoky Cheddar Heart Crackers
March 10, 2024
Winter Travels and Smoky Cheddar Heart Crackers
March 10, 2024

March 10, 2024

February has been an exciting month of holiday celebrations for us. This year, Lunar New Year landed in the month of February, and so we traveled back to Brooklyn, New York to celebrate with family and friends. Right after Lunar New Year, we celebrated Valentine’s Day with Z at home. Z had quite the haul from both holidays. She received a stack of red envelopes from our family for Lunar New Year and then another stack of Valentine’s Day cards and toys from her classmates. Shortly after the February holiday celebrations, we took another short trip up north to see the Ice Castles in the heart of New Hampshire. Z marveled at the icy tunnels and structures and made her way through the icy walkways. Aside from all the February fun, I’ve been making smoky cheddar heart crackers throughout the month, testing and retesting my recipe. These snack crackers are very loosely inspired by my love of Cheez-It growing up. My version of the addictive cheddar crackers is made with super simple ingredients and are the perfect snack to pack for long (or short) car rides. With Z now more mobile than ever, we often find ourselves packing a lot of books, toys, and snacks to keep her occupied on road trips. These smoky cheddar crackers do the trick of helping satisfy her hunger and keeping her occupied at the same time. When making these cheese crackers, I like to use a fun scalloped heart-shaped cookie cutter to cut these crackers out as the fun heart shape makes them appealing to Z. I’ve packed these smoky cheddar crackers on multiple car rides with Z from short trips to much longer road trips. Z snacked on a handful of these crackers throughout our trip to New Hampshire and during snack time in the mornings and afternoons at home with grandma. The best part is I could whip these up in no time and keep them in the refrigerator for a few days. Not only are these crackers toddler-friendly, they are also adult-friendly. Whenever my cravings for savory snacks kick in, I could easily grab a handful of these snack crackers to enjoy as either a mid-morning snack or a late afternoon snack. To make these smoky cheddar heart crackers, I pulse together all-purpose flour, salt, sugar, smoked paprika, freshly cracked black pepper, butter, grated sharp cheddar cheese, and a couple tablespoons of cold water. The cold water works to bind everything together. The process I use for making these smoky cheddar crackers is similar to the process I use for making pie dough. Essentially, I drop all the ingredients into the food processor and let the food processor do its job to bring everything together. I then roll out the dough as thin as possible and chill the dough in the refrigerator for at least an hour before cutting out the heart-shaped snack crackers. Right before I pop them into the oven for baking, I artfully arrange the heart-shaped crackers on a parchment-lined baking sheet. About 18 minutes later, I end up with the perfect snack crackers. I have even left the crackers in the oven for a smidge longer (about 3-5 minutes) on a couple of tries to yield a toastier version of the cheddar crackers. As an optional step, I top these snack crackers with a pinch of Maldon salt just before serving. I love making these crackers on weekends when the weather outside turns chilly. This month has brought us multiple cold and somewhat snowy weekends. These snack crackers kept my cravings (and my family’s cravings) at bay throughout the mostly chilly February month.

Read more →
March 10, 2024
Barbecue Chicken Bo Lo Bao and Adventures with Z
December 17, 2023
Barbecue Chicken Bo Lo Bao and Adventures with Z
December 17, 2023

December 17, 2023

Winter in New England is truly a wonderful experience. The temperature has steadily dropped as well, which means out comes the winter hats, gloves, scarves, thick sweaters, and cozy socks. The transition to winter is an exciting time in New England since there is just so much to do not just in Massachusetts but also in the neighboring states. Over the last couple of months, Z has grown into such an energetic toddler. To help expend some of her energy, we’ve been taking her to a ton of local events in the neighboring states. Aside from all these adventures with Z, I’ve been actively working to develop more recipes to share on my site. A few months ago, when I was developing my recipe for egg tarts with a twist, I was simultaneously working on a recipe for my take on bo lo bao (or pineapple bun). Pineapple bun is a beloved bakery item that I grew up eating in Brooklyn. Contrary to the name, there is no pineapple in the bun (although, I have seen some bakeries incorporate pineapple into the actual buns). The name comes from the golden yellow cookie topping that is perfectly positioned at the top of a fluffy milky bun. The cookie topping forms a crack while baking in the oven. Once baked, the cookie topping resembles the appearance of a pineapple or bo lo. I wanted to combine my family’s love for bo lo bao with another family favorite, char siu bao, and ended up creating a barbecue chicken bo lo bao. My barbecue chicken bo lo bao is essentially a twist on a twist of two classic Chinese bakery buns combined into one. I grew to love bo lo bao mainly because my dad loves it. He would buy bo lo baos at the local Chinese bakeries near my childhood home in Brooklyn for breakfast, lunch, and even dinner at times. His love for bo lo bao spilled over to my brothers and I, and we often find ourselves craving bo lo bao whenever we walked by a Chinese bakery. Kevin, on the other hand, grew up in Hong Kong and has had his fair share of bo lo baos throughout his time living there. He remembers fondly the features of truly delectable bo lo baos especially when they are freshly baked and eaten straight out of the oven. For both of us, the hallmark of an excellent bo lo bao is the balance of a fluffy milky bread base and a crunchy cookie topping baked to golden perfection. A bo lo bao isn’t a bo lo bao unless there is a golden yellow cookie topping resembling the appearance of a pineapple positioned perfectly on top of the fluffy bread. Bo lo baos are best enjoyed when they are still warm out of the oven with the crunchy cookie topping intact. When I set out to recreate the bo lo bao, I thought back to my memories of the perfect bo lo bao before diving into research to recreate a version as close as possible to the ones I ate throughout my childhood. One bread baking technique that is often used in Chinese bakeries is tangzhong (or water roux). Essentially, you precook a portion of the liquid and flour to create a roux and then fold the roux directly into the bread dough during mixing. The addition of the tangzhong is what contributes to the ultra-fluffy, super soft bread texture. Tangzhong is often used in milk breads to help them achieve the signature fluffy texture. The tangzhong combined with letting the dough sufficiently rest is what results in the ideal pillowy texture of the bread. Ever since I incorporated tangzhong into bread baking, it has become such a game changer. Time after time, batch after batch, the bread always turns out ultra pillowy and soft. I’ve started to incorporate tangzhong into baking as often as possible whenever I want a reliably fluffy bread. On colder days, all I want to do is to bake up batches of these delicious bo lo baos to serve alongside some milk tea. For me, there is nothing more relaxing on a cold weekend than enjoying a bo lo bao straight out of the oven with a cup of steaming hot milk tea.

Read more →
December 17, 2023
Egg Tarts with A Twist and Summer Adventures with Z
September 4, 2023
Egg Tarts with A Twist and Summer Adventures with Z
September 4, 2023

September 3, 2023

Happy summer! It has been a while since I last posted. I’ve been spending all of my time outside of work planning fun family activities to keep Z occupied throughout the summer. She has reached the stage where she has tons of energy and needs to expend the energy daily. We’ve had a couple of beach days, seen some family-friendly shows, strolled through historic homes in New England, visited museums throughout Massachusetts, and even had our first semi-long family road trip to Bar Harbor. When we aren’t out and about as a family, I’ve been testing out new recipes and refining upcoming recipes to share on my site. One recipe I have been working on and am finally ready to share is my take on Portuguese-style egg tarts, inspired by the famous egg tarts sold throughout Macau and Hong Kong. These egg tarts are also a favorite dim sum dish of ours. Dim sum is a dining ritual we’ve had in our family since childhood. I still remember fondly all the moments during my childhood where I would go to dim sum with my family and order all my favorite dishes. I would always go for the shrimp dishes (usually har cheung or har gow) and finish with a sweet treat during dim sum. The sweet treat of choice ranged from ma lai go to sesame ball with red bean paste to egg tarts. Egg tarts are truly amazing when enjoyed straight out of the oven. As much as I love the traditional egg tarts, I also love the Portuguese-style egg tarts. Portuguese-style egg tarts differ from traditional egg tarts in some fundamental ways. Portuguese-style egg tarts tend to have a puff pastry crust and an egg custard made with egg yolks baked at a high temperature to yield toasty brown spots. I love eating these egg tarts whenever I’m in Hong Kong or Macau. They’re one of my favorite dim sum treats to enjoy toward the end of the meal when I want something sweet to balance out the savory dim sum dishes. During the first few years when Kev and I dated, we vacationed in Macau and had the opportunity to enjoy freshly baked Portuguese-style egg tarts. The experience of biting into a piping hot egg tart straight out of the oven is a truly decadent experience. For a moment, all the world seems to fade away as I bite into the buttery, flaky crust before my teeth sinks into the silky, smooth egg custard filling. I would describe the Portuguese-style egg tart as a fun cousin to the traditional egg tart. With my parents staying with us in Massachusetts for the time being, we’ve jump started our dim sum ritual once again. Every other weekend, we would head over to Ming’s Seafood Restaurant in Malden to get our fix of dim sum. My mom’s go-to dim sum dishes are always beef tripe and chicken feet. My dad opts for the lo mai gai (glutinous rice and filling wrapped in lotus leaves) and sesame ball filled with red bean paste. Although Kev usually goes for xiao long bao, he hasn’t found a worthy substitute near us. So, he just eats whatever we order for the table. I go with my usual har cheung and har gow and occasional egg tart. Since I started making egg tarts at home myself, we’ve been ordering egg tarts a lot less frequently during dim sum. Egg tarts are composed of two parts – the flaky shell or crust and the egg custard filling. For the shell or crust, I like to make a more decadent version of my shortcrust pastry dough, essentially the dough I use for all my pies. Egg tarts also require special tart tins, so I ordered a set just to make them. It’s worth it to order a set of these tins if you make tarts a lot like we do in our home. Whenever I crave egg tarts, I just whip up the shortcrust dough in my food processor and shape the dough right away in the mini tart baking tins. I then transfer the tins to the refrigerator to let the dough chill in the tins for about twenty minutes. As the dough is chilling in the refrigerator, I move onto making the egg custard filling, which is composed of just four ingredients – egg yolks, granulated sugar, whole milk, and heavy cream. A fifth, but totally optional ingredient is vanilla bean paste, which I sometimes add to the egg tarts to give them another fragrant flavor. I whisk these ingredients together thoroughly and then strain them through a sieve a couple times to remove air bubbles. Straining the egg custard filling helps ensure a smoother egg custard filling in the egg tarts. I pour the prepared filling into the shortcrust dough filled tins and bake the tarts in the oven for 20-23 minutes at 425°F. Once the egg tarts have baked for twenty minutes, I check on them and see if they need a smidge more baking time. I always check for brown spots on the egg tarts as a sign that the egg tarts are well on their way to being done. The egg tarts do need to cool for a bit straight out of the oven before enjoying. Otherwise, you will end up with a burned mouth. For a coconut twist on the egg tarts, I folded in a half cup of coconut flakes into half of the shortcrust dough before filling the tins with the dough. These egg tarts with a twist are perfect for a weekend brunch, afternoon tea, or dim sum at home. My parents, who are usually traditionalists when it comes to dim sum dishes, voiced how much they liked the coconut twist on egg tarts. We even packed leftover egg tarts to enjoy during our family trip to the beach.

Read more →
September 4, 2023
Dragon Fruit Strawberry Cupcakes and Z’s First Birthday
May 29, 2023
Dragon Fruit Strawberry Cupcakes and Z’s First Birthday
May 29, 2023

May 29, 2023

Z has officially reached a new milestone this month. She turned one year old and has been walking with some assistance. For such a momentous occasion for Kev and I, we had to celebrate in a special way. I thought back to all our adventures with Z throughout the year and still cannot believe how quickly time has flown by. The early days were much longer than we would like, but watching Z grow from day to day has brought us so much joy. I remember exactly a year ago in May when we brought Z home from the hospital. She was a tiny baby weighing just over six pounds. The early days were the most challenging days. We operated on very little sleep and had to return to work fairly quickly. Kev had two months to bond with Z. I had slightly less. Luckily for us, aside from some challenges with sleeping through the night, Z cooperated with us for the most part. She ate pretty much anything we offered and reached all her milestones at the predicted times. Watching Z grow from a tiny baby to a tiny human has been an absolute joy. When I look at her today, I still cannot believe the tiny human half my height was only born a year ago. As her birthday approached this year, I had to think of a special way to celebrate. I did some googling and brainstorming for inspiration. Though there were a lot of ideas out there on the internet, I wanted to do something unique for Z. I wanted to center her birthday celebration on a children’s book theme. When I came across The Wonderful Things You Will Be book sitting on her bookshelf, the idea for her birthday celebration was born. Wonderful became onederful or 1derful of course. With the theme decided, I shifted my focus to the desserts. Growing up in our household, desserts tend to be on the simpler side. We usually had a sponge cake with cream and fresh fruit that my parents bought from a local bakery and a plate of fruits. I wanted to apply the same tradition to Z’s birthday and merged a celebratory treat with a realistic baby-friendly sweet. Z would get a variety of fruits, while we would get to enjoy the baked treats. Z ended up with a fruit plate. We ended up with cupcakes and cake pops. Z’s cupcakes and cake pops had to be special and different from the ones I typically make, so I decided to merge my go-to strawberry cupcakes with red dragon fruit. I opted to add red dragon fruit to strawberry cupcakes mainly because of the Barbie-like pink color found naturally in the red dragon fruit. I first tested out the combination of dragon fruit and strawberries when developing a dragon fruit raspberry hot chocolate recipe for the colder months. I interchanged the raspberries and strawberries in the hot chocolate recipe as they both offer the same type of sweet and slight tart balance to the hot chocolate. I loved the combination of the slightly sweet dragon fruit paired with the sweet and tart strawberries so much that I extended the flavor profile to my cupcakes and cake pops. Dragon fruit itself has a mild sweetness to it and pairs perfectly with strawberries. When combined, the dragon fruit and strawberry puree gives the cupcakes and frosting an eye-catching pink dessert reminiscent of Barbiecore pink. The bright vibrant pink comes naturally from the red dragon fruit and is enhanced further from the redness of the strawberries. I only buy red dragon fruit occasionally because of how expensive it is. Red dragon fruit is texturally like a kiwi, but is much less sweet with a slight tartness to it. Folded into cupcakes, you get not only a delicious sweet treat, but a truly stunning pink treat. My cupcake recipe yielded exactly twelve cupcakes, which fit perfectly into a 12-cup muffin tin. Half of the cupcakes were served as cupcakes, while the rest were crumbled into a bowl, mixed with some frosting, and turned into cake balls for cake pops. The cake pops were dipped into colored candy melts and left to harden. I only used white, red, yellow, and blue candy melts for the cake pops, mixing some of the colors together as needed to form orange and purple for other color options. To allow the cake pops to harden without disturbance, I used the back of a collapsible silicone colander as a makeshift cake pop holder. The candy-coated cake pops were intended to look like balloons that floated on the cover of the children’s book. The best part about these treats is the stunning Barbie-like pink color comes naturally from the colors of the fruits without the added food coloring. Since Z’s palate is still developing at this age, a mild fruit such as dragon fruit was the perfect fruit for her to try. To round out the rest of our dessert spread, we had to have an equally stunning fruit plate, a must-have in our household. We served it up to Z just so she can get a head start on our family traditions. With the fruit plate, cupcakes, and cake pops all prepared, we just had to snap some photos before digging right into the lovely desserts.  

Read more →
May 29, 2023
A Strawberry Twist on Iconic Black and White Cookies
March 31, 2023
A Strawberry Twist on Iconic Black and White Cookies
March 31, 2023

March 31, 2023

I have been working on recreating the iconic black and white cookies over the last couple of months. Black and white cookies are classic New York City treats. When I lived in New York City, I would see them in bakeries throughout Brooklyn and Manhattan. Even so, I’ve only had them occasionally. I still remember my first time taking a bite out of the black and white cookie from Zaro’s Bakery. The soft yet springy cookie topped with a vanilla and chocolate glaze was absolute perfection. It was as if a cookie and a cake had a baby. Whenever I passed by the Amtrak station in Manhattan, I would purposely make a stop at Zaro’s Bakery for one of its black and white cookies. I even served up individually packed versions of black and white cookies from Stern’s Bakery back in 2018 when Kev and I got married in Queens. Needless to say, black and white cookies are as dear to me as some of the more iconic New York City treats. I am, of course, referring to my love of pizza, bagels, and pretzels. Because of how accessible the cookies are, it never even crossed my mind to recreate them. That changed a couple months ago, when I had intense cravings for black and white cookies. While the options around me were sufficient, I really missed the version of black and white cookies from Zaro’s Bakery. I remember distinctly the mega size, the strong vanilla flavor of the cookie base and the balance of chocolate and vanilla glaze coated over the top of the cookie. In reality, the glaze actually coated the bottom of the cookies since they’re flipped over after baking. Either way, the glaze is an essential element of the black and white cookie. I decided it was time to try and recreate a classic black and white cookie. I scoured the web for sources on what actually went into the black and white cookies at Zaro’s Bakery and ended up watching one too many YouTube videos as I gathered information. I then shifted to developing and testing out the cookie recipe. I tested different ratios of ingredients and kept close notes of each iteration. After multiple tries and feedback from Kev and my mom, I finally settled on my preferred version. I found that a combination of cake flour and all-purpose flour yielded the perfect black and white cookies. Cake flour provided the cookies with tenderness, while all-purpose flour provided the cookies with structure. Adding just vanilla extract was not enough to give the cookie the extra oomph it needed and so I took a page from Stern’s Bakery and folded lemon zest into the batter. Other ingredients for the cookies included butter, sugar, honey, kosher salt, egg, sour cream, baking powder, and milk. I learned that many of these ingredients were necessary for helping the cookies stay moist, and they were essential in the version from Zaro’s. A couple tablespoons of pureed strawberries folded into the batter made these cookies exceptional. The addition of pureed strawberries yielded a tangy, sweet cookie with a fresh strawberry flavor. To appease all the cookie lovers in our home, I created three options for the glaze to top the cookies with. The simple glaze consisted of pairing black and white, black and pink, and white and pink for three varieties of cookies. The white part of the cookie came from a simple glaze made with confectioners’ sugar, corn syrup, and vanilla extract. The black part of the cookie came from the addition of cocoa powder. The pink part of the cookie came from the pureed strawberries. I baked and decorated a batch of these cookies for Valentine’s Day last month as a treat for my family. I even reserved a pink and white version as a smash cookie for Z. Z couldn’t quite figure out how to taste the cookie, but she sure did have a good time smashing the cookie with her fingers. Only time will tell if these cookies will be a home run for her. Enjoy these cookies as my nod to New York City with a twist.  

Read more →
March 31, 2023